13" MacBook Left Speaker Replacement
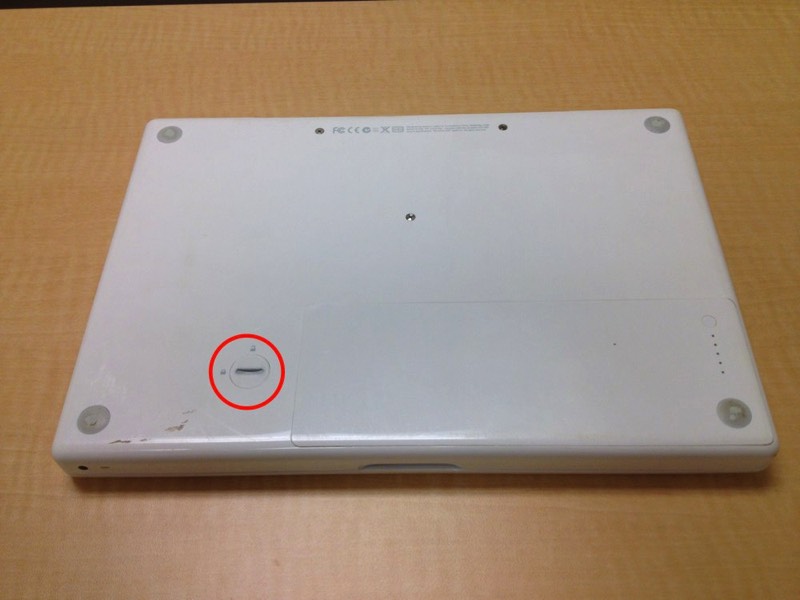
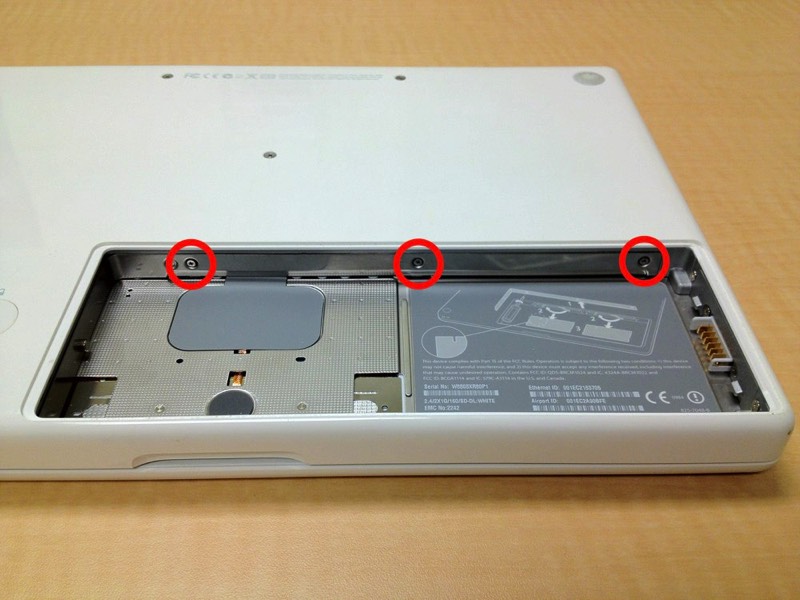
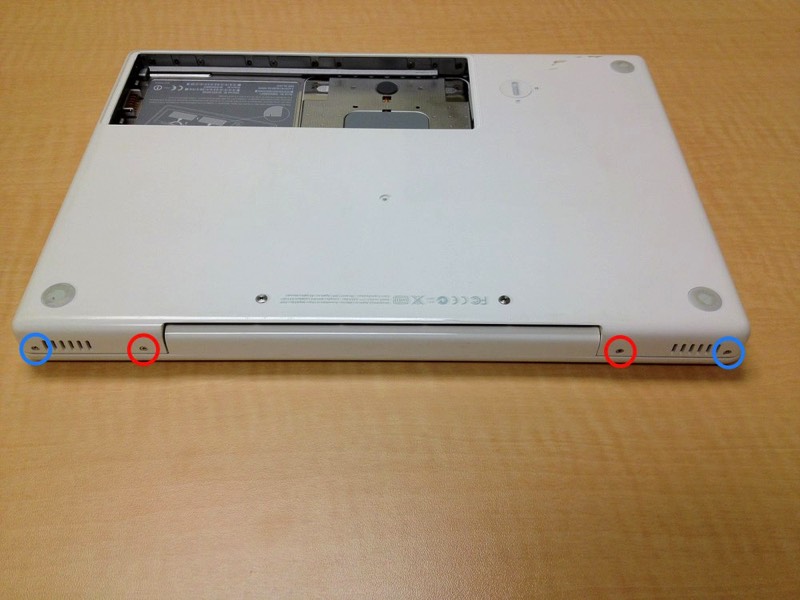
Look on the bottom of the case and remove three Phillips screws. The two screws in the rear are 14.5 mm and the center screw is 11 mm.
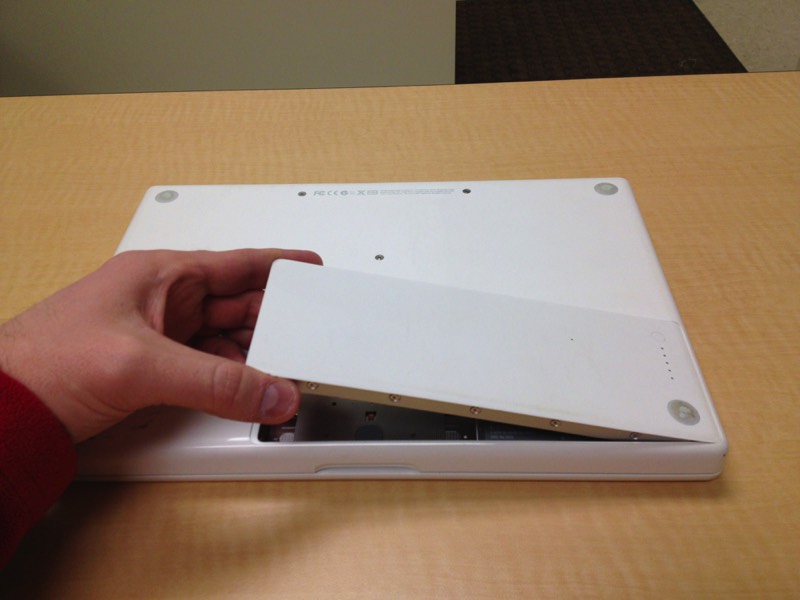
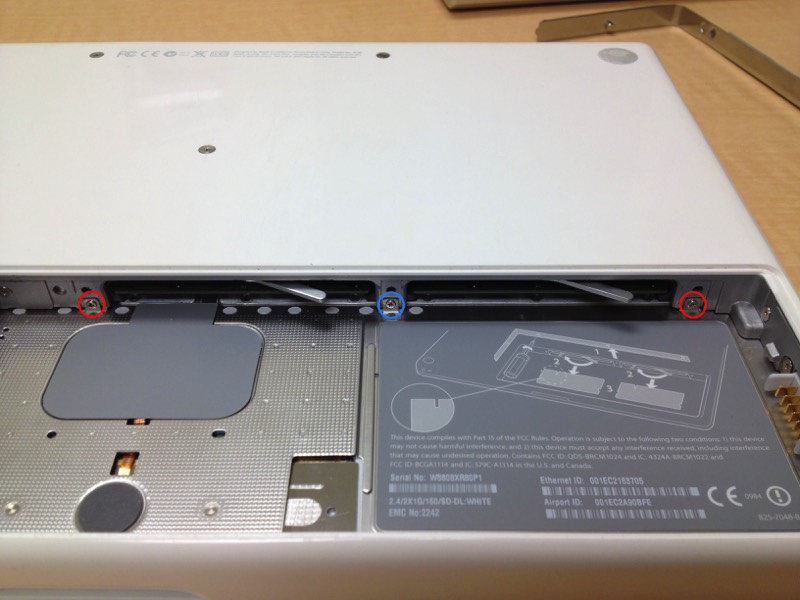
The two rear screws, 14.5 mm, may or may not come out of the case easily. If you can use a magnet, tweezers, or leave them in. If you leave them in just be 100% certain they are fully loosened.
The two rear screws, 14.5 mm, may or may not come out of the case easily. If you can use a magnet, tweezers, or leave them in. If you leave them in just be 100% certain they are fully loosened.
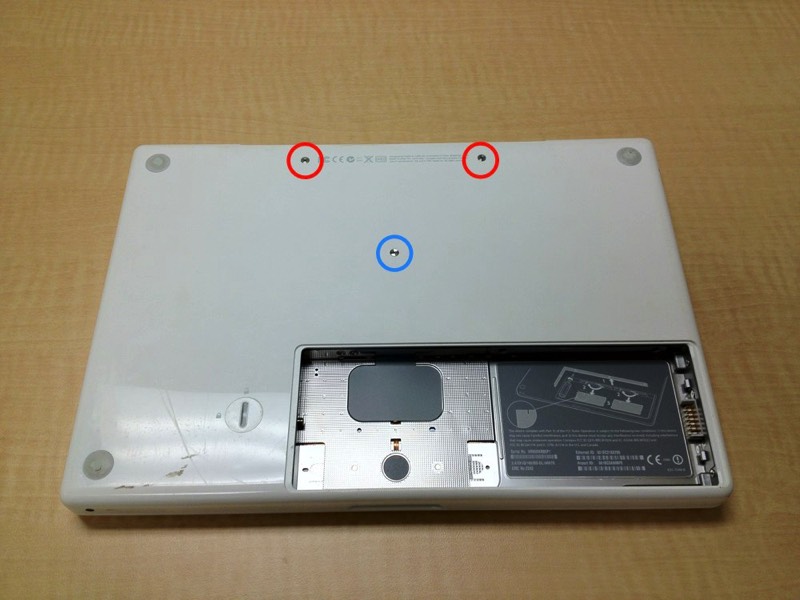
Look on the bottom of the case and remove three Phillips screws. The two screws in the rear are 14.5 mm and the center screw is 11 mm.
The two rear screws, 14.5 mm, may or may not come out of the case easily. If you can use a magnet, tweezers, or leave them in. If you leave them in just be 100% certain they are fully loosened.
The two rear screws, 14.5 mm, may or may not come out of the case easily. If you can use a magnet, tweezers, or leave them in. If you leave them in just be 100% certain they are fully loosened.