Drive Belt Idler Pulley Replacement (Accessory)
| Tools & parts you will need: | Date: |
Perform all these installs at your own risk. Know how to use all of your shop equipment and take necessary safety precautions when performing ANY modifications and or maintenance items to your vehicle. Seek the advice of a paid professional and do not substitute this publication for the advice of a paid professional. This product is how we accomplished our installs and is not meant to be carved in stone. We are not responsible for a mistake, misprint, or any other error found in this guide. This guide is intended as a supplement and not to be your only source of information.
Purpose: This install serves one purpose, to eliminate the squeak you might hear at idle and low speeds. It is a very annoying squeak and will drive you insane after a few months.
Preface: Before you start into this install be sure you know how to use all of your shop equipment. Take your time and be careful. You will also notice I have the word, "accessory", placed in parentheses next to the name of certain parts. This is because there are two separate drive belts on the LS1. One is labeled accessory and the other is labeled a/c (for air conditioner). So to not confuse the two, I will stick to the technical labeling. "Accessory" will be left out of the pictures because of space requirements.
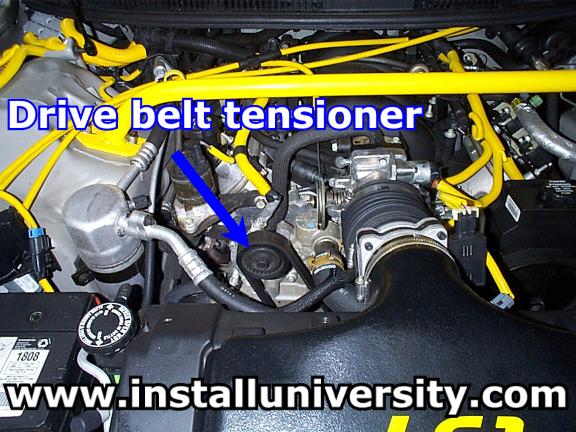
1. Open the hood of your car and locate the drive belt tensioner (accessory) on the passenger side of the engine (see Figure 1).
Figure 1
2. Locate the drive belt idler pulley (accessory) on the drivers side of the engine (see Figure 2).
Figure 2
3. You will need to remove the drive belt (accessory) in order to remove the drive belt idler pulley (accessory). To do this you must use a ratchet and 15 mm socket. Place the socket on the 15 mm bolt in the center of the drive belt tensioner (accessory) and turn the bolt toward the drivers side of the vehicle as shown in Figure 3. This will push the tensioner over enough to loosen the belt off of the drive belt idler pulley.
This is best accomplished with a friend. As the friend pushes on the drive belt tensioner (accessory), you can take your finger and move the belt off of the idler pulley as shown in Figure 4. Just be carefully you don't knock the drive belt (accessory) off all the pulleys. It is no big deal if you do but just an inconvenience. You can locate the belt routing sticker (see Figure 5) underneath your hood to see how to route your belt back onto your pulleys if it does fall several of them.
Figure 3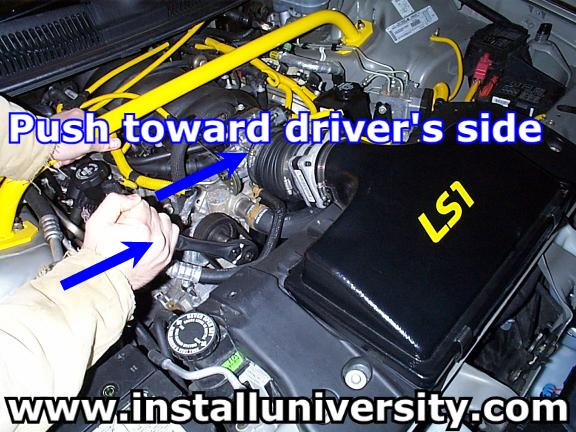
Figure 4
Figure 5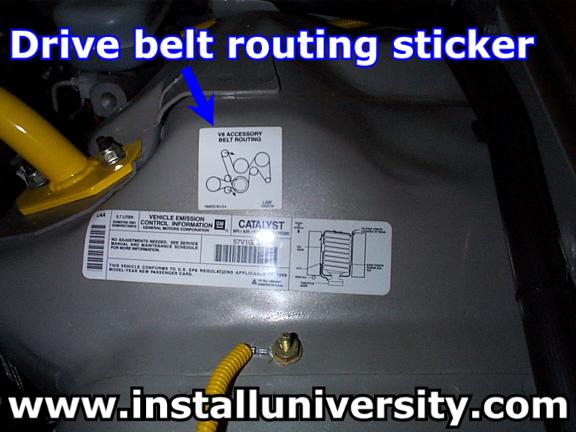
4. Once the drive belt (accessory) has been removed from the top of the drive belt idler pulley (accessory), take a ratchet and 15 mm socket and remove the bolt in the center of the drive belt idler pulley (accessory) as shown in Figure 6. Once the bolt is removed, remove the drive belt idler pulley (accessory).
Figure 6
5. Place your new drive belt idler pulley (accessory) is pressed all the way on the back of the shoulder on the generator bracket. Install and hand tighten the new bolt that came with the drive belt idler pulley (accessory). Use a 15 mm socket and torque wrench and tighten the drive belt idler pulley bolt (accessory) to 37 ft-lb as shown in Figure 7.
Figure 7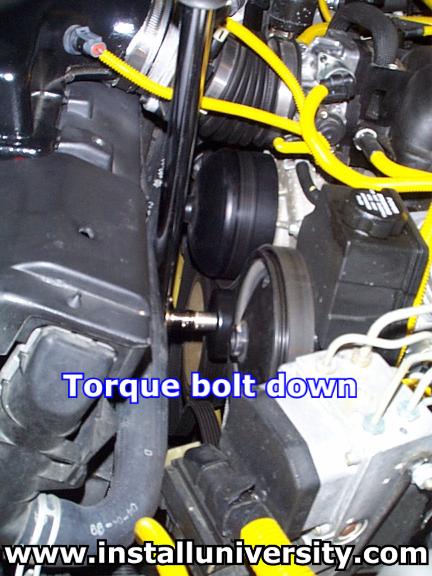
6. You will need to replace the drive belt (accessory) back on to the drive belt idler pulley (accessory). To do this you must use a ratchet and 15 mm socket in the same manner you loosened the drive belt (accessory). Place the socket on the 15 mm bolt in the center of the drive belt tensioner (accessory) and turn the bolt toward the drivers side of the vehicle as shown in Figure 3. This will push the tensioner over enough for you to replace the belt back onto the drive belt idler pulley (accessory). Be sure to check all other pulleys to make sure the belt has been seated properly. If the belt has not been seated properly, i.e. not lined up in the grooves correctly, you could damage and throw a belt while driving.
This is best accomplished with a friend. As the friend pushes on the drive belt tensioner (accessory), you can work the belt back over the pulley(s).
7. Start your car and inspect the drive belt (accessory). Just make sure the belt is lined up and properly seated. If everything looks ok, you are done. If the belt is not properly lined up, go back to and repeat Step 6.
Web Author: Eric Barger help@installuniversity.com
Copyright © 1999 - 2002 Eric Barger. All rights reserved.
Revised: June 07, 2007 .