iMessage Setup
iOS 5.0.1 - iPhone 4S AT&T - 1/4/2011
Seting up iMessage on your iPhone and iPad can be more involved than the typical Mac user is accustom to. Let's look at how to properly setup iMessage and examine some features that may help you keep your identity in your control. We want to focus on setting up iMessage to receive iMessages at multiple delivery points (email addresses).
Choose the Settings app and then touch the Messages button.
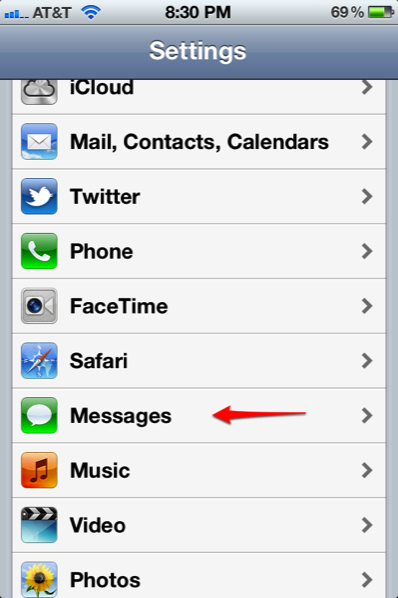
In the Messages window, you can see that you have several options to choose from. If you are setting up iMessage it means you want to use it. So be sure you have iMessage on. ;-)
The Send Read Receipts allows people who send you an iMessages to know you have received and read the message.
When the Send As SMS option is on lets you send a traditional text message when iMessage is unavailable. iMessage would be unavailable when you are on basic cell service without cellular data support. If you don't have a text plan, you may want to keep this option turned off. I personally don't have a text plan so I keep this option off. Please note this will not stop people from sending you text messages.
Receive At allows you to receive iMessages at email addresses that you control besides your iCloud email. This is great news for people like me who want to hand out my work email as an iMessage capable address and a personal email for family. It appears I have really separated out my life with one phone number and three emails. :-D We want to look at this option more closely in a minute and that is why you see the red arrow pointing to my separate iMessage life.
Under the SMS/MMS section you can turn off MMS Messaging so your phone cannot send photo's or video's through traditional text messaging. I have this off since I don't have a texting plan. In case you are wondering, I utilize a Google Voice number so I get unlimited texting and creepy robots at Google analyzing my every character for ad revenue research.
The Show Subject Field and Character Count should be obvious options for phone users.
Go ahead and touch the Receive At button and let's take a deeper look at this option.
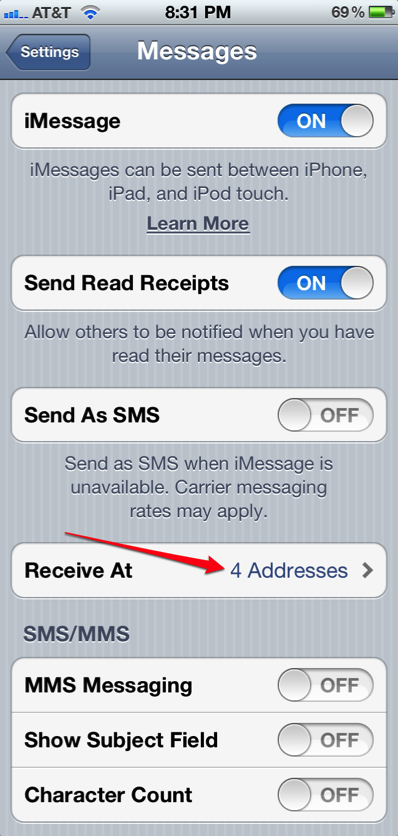
You are now located in the iMessage window. You can touch the Apple ID button to enter your Apple ID and start using the free service or sign out of iMessage.
Your phone number given to you by your service provider is going to show up here. This cannot be changed and will appear in iMessage as long as you are signed into the service.
Your iCloud or Apple ID is most likely your second point of contact and then you can add the other emails that comprise your life. xxx@installuniversity.com is an example of an email that may or may not be blurred out of the extra emails.
Just touch the Add Another Email button to add additional emails that you would like to see. You will have to be able to verify these emails by receiving an email from Apple at the address you want to add. This process can be hit and miss and what I mean by that is once an email has been verified, it may still appear unverified. Don't worry, it has been verified, you just need to click on the unverified (but verified) email or signing out of iMessage and back in for the change to take effect.
Caller ID is another very cool option! Let's click on the Caller ID button and see what we find.
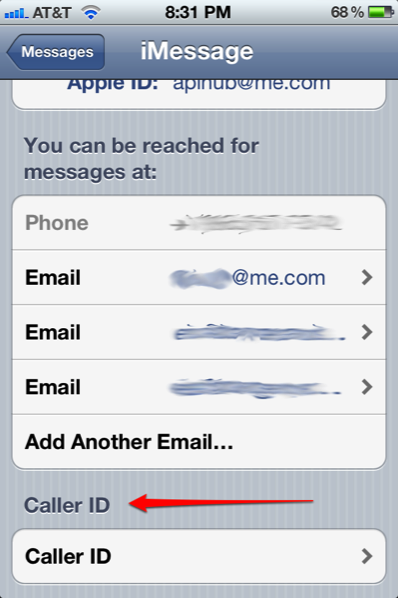
On the Caller ID window you can see all the iMessage delivery points and you can choose which one shows up when you iMessage another iOS device. I chose my .Com email and it happens to be my work email. This way I keep my real phone number given to me by AT&T a national secret since I want everyone to use my Google Voice number.
That's it, you are set up!
That's it, you are set up!
