Fuel Filter
2002 C240: Fuel Filter Change
When viewing, using, and/or any other method applied to this publication you agree to the following statements. You, your next of kin, heirs or assigns release www.installuniversity.com, all other persons associated in the making, production, and participation of this publication. Rephrased in plain English: When you view this web page you, your next of kin, heirs or assigns agree not to sue any associated persons with the publication for any accident or damage in ANY form (mental or physical to your car and/or yourself) because of this publication, or your failure to heed proper safety, maintenance and/or modification procedures. You also agree that your next of kin, heirs or assigns cannot sue all persons associated in the making, production, participation, and publishing of this publication.
Perform all these installs at your own risk. Know how to use all of your shop equipment, and take necessary safety precautions when performing ANY modifications and or maintenance items to your vehicle. Seek the advice of a paid professional and do not substitute this publication for the advice of a paid professional. This product is how we accomplished our installs and is not meant to be carved in stone. InstallUniversity.com is not responsible for a mistake, misprint, or any other error found in this guide. This guide is intended as a supplement and not to be your only source of information.
Symptom(s): You travel to your local Mercedes Benz dealer and you get you a quote of $175 for a 30 minute job and $25 filter.
Date Repaired: 12.312006 Mileage: 133,500
Quote to fix from local MB dealer: $180
Part information, cost, were purchased:
1. Fuel filter from NAPA - Part number: 3643 - $25
Time it took to install: 30 minutes
Complexity of Install: Easy
Tools needed for this install:
1. Ratchet
2. Short socket extension (3" will do)
3. 10 mm socket
4. 8 mm socket (may not be needed)
5. Ramps - Lift - Jack stands and jack
6. Rags (lots of them)
7. Safety glasses
8. Well ventilated area
9. Philips screwdriver
10. Flat head screwdriver
11. 10 pairs of latex gloves
12. Pliers (may not be needed)
13. Patience
Install Contributors
1. Steven Lewis (a.k.a. saturnstyl @ MBWorld.org)
Introduction
This is an easy service to perform and will cost you much less than MB performing the installation.
Installation Procedure
1. Raise your hood, and locate the front of the engine cover shown in Figure 1. Lift up on the front of the cover. Once it pops free, it will still be connected, pull it toward the front of the car. You may need to remove the oil filler cap to disengage the front engine cover. If you removed your oil filler cap, please put it back on once the front cover has been removed. Warning: If you do remove the oil filler cap, make sure no contaminants fall in the filler neck.
2. Locate the front intake tubes shown in Figure 2. Detach the intake tubes from the air filter housing assembly by pulling back on the front intake tube where it meets the air filter housing. The arrows in Figure 2 show where to grab, and pull toward the front of the car. Figure 3 shows the front intake tubes detached from the air filter housing assembly.
3. Grab hold on one side of the air filter housing, I always choose the passenger side, and pull up on the housing (see Figure 4). Don't be shy about doing this. It takes some effort to pop the assembly free, but once it pops free, it comes right off. Be very careful with the air filter assembly. Warning: Stay away from the screen housing on the back side of the engine once the air filter assembly is removed from the top of the engine. This goes directly into the engine and is near the mass air flow (MAF) housing. The MAF sensor is VERY expensive to replace and is a must for your car to run. No big deal, just stay away from it.
4. Locate the Schrader valve located on the front passenger side of the engine compartment at the end of the fuel rail (Figure 5). Unscrew the plastic cover. Place at least 4 very thick paper towels around this valve and use a screwdriver to release the pressure. Be sure you have the towels around the valve so that no gas can escape. Press and release several times to ensure you have released all the pressure from the gas line.
5. Perform steps 3 through 1 putting back your air filter housing and closing your hood.
6. Raise your vehicle on a lift, ramps, jack stands, or suitable safe position in a safe manner. You have a choice whether you want to get under the car and make it a SAFE one. Take no chances with your life (Figure 6).
7. Remove the under car cover for the driver side rear. This panel is long and has eight 10 mm plastic flanged nuts (Figure 7). Lower the panel an inch and slide it back at the same time. If you have problems removing the under cover, remove the 8 mm screw that holds the rear front under cover on and the cover will just fall out.
8. Locate the fuel filter in front of the driver side rear wheel (Figure 8). Use a Torx 20 screw driver and loosen the fuel filter holding strap as shown in Figure 9. Next, loosen the four hose clamps using a phillips screw driver (a flat head screwdriver may be needed depending on your clamps). Once the clamps have been loosened, move them so they can easily rotate around the hose.
9. This step will have gasoline coming out. I would guess at least a pint of gas will exit the filter and hoses so prepare you a catch can (Figure 10) to safely contain the gas. Have plenty of rags around to wipe up any mess, and wear your safety glasses.
Take your flat head screwdriver and easily pry the hose away from the center of the fuel filter while pulling on the hose itself. About 30 seconds a hose will get them to release.
10. Take your new filter and replace it being sure to get the flow arrow pointing in the correct direction as shown in Figure 11 (toward the outside of the car).
11. Slide each of the four hoses back onto the filter and tighten the hose clamps. Then place the strap over the filter and tighten the Torx 20 screw (see Figure 12).
12. At this point you need to check for leaks. Turn the key to the far most right position without starting the car. After 5 seconds, turn the key off, remove it from the ignition and repeat. After 5 seconds have passed go ahead and start the car. Let the car run for 10 - 15 seconds and shut it off. Check for leaks around the fuel filter hose connections.
13. Replace the driver side rear under cover making sure to slide it under the front rear under cover. Hand tighten the flanged nuts, don't over tighten these as they strip easily.
14. Lower the car and your done!
Click on the photographs to enlarge them.
Figure 1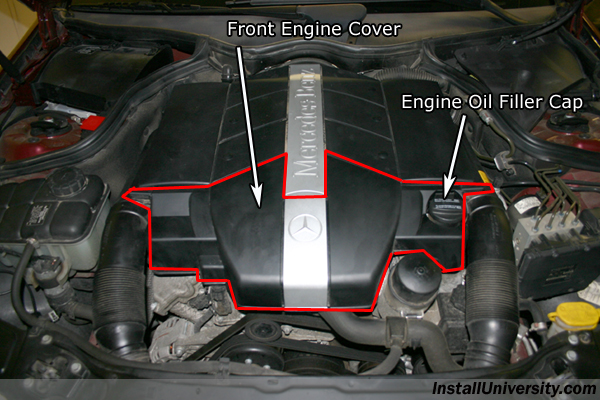
Figure 2

Figure 3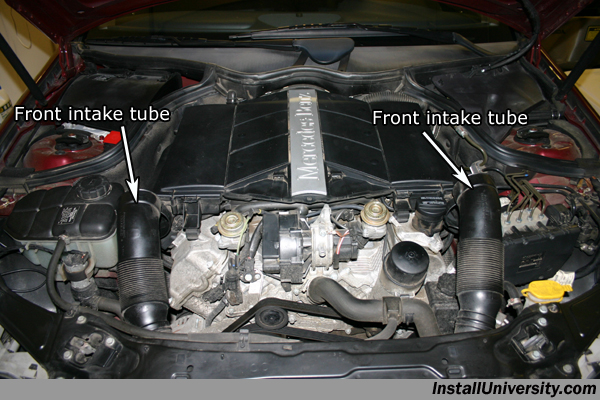
Figure 4
Figure 5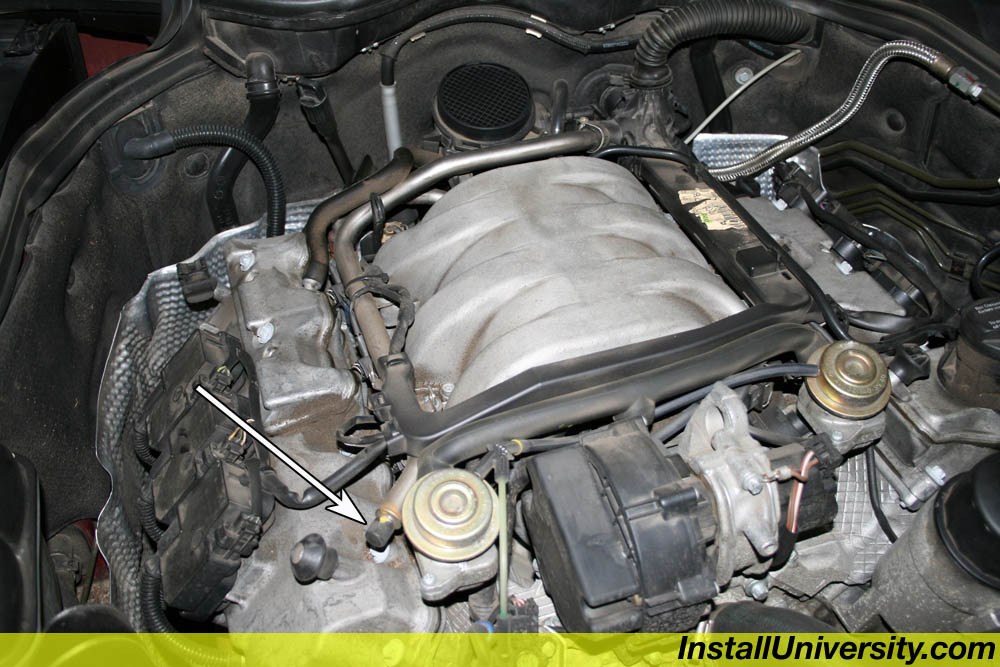
Figure 6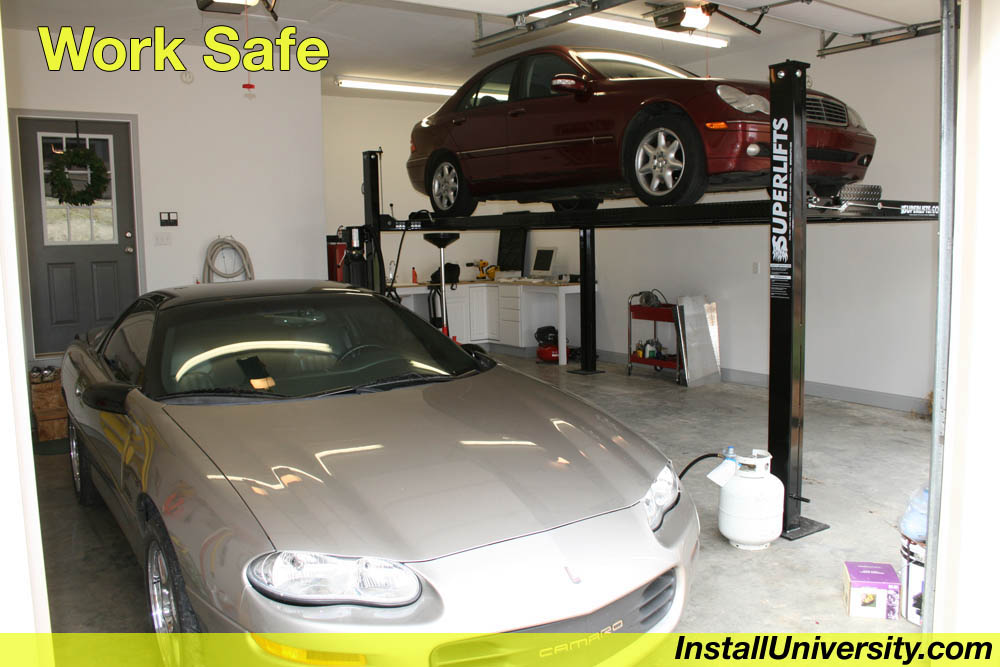
Figure 7
Figure 8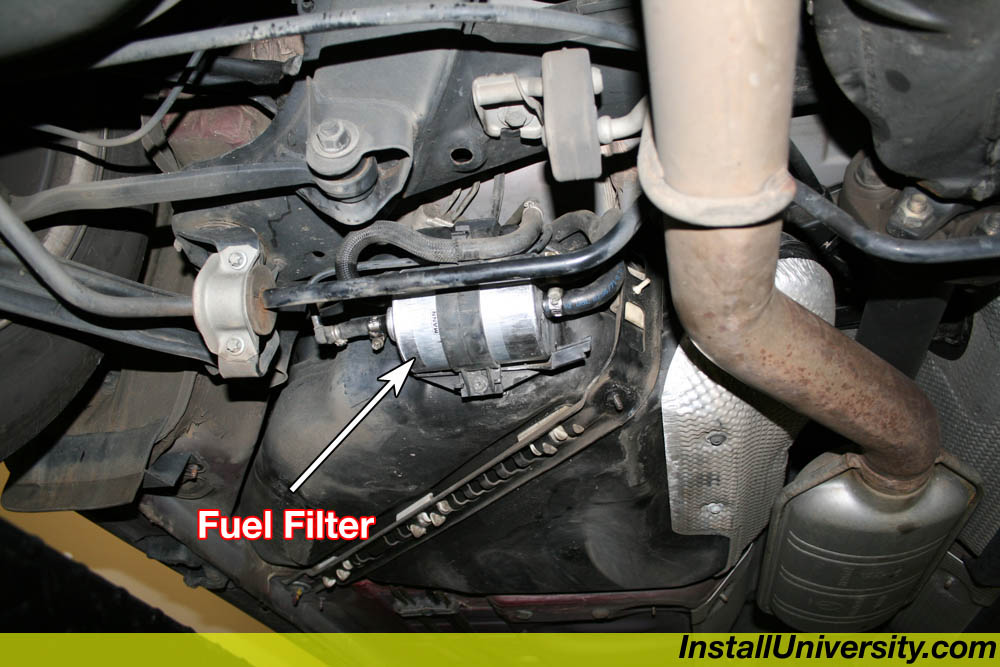
Figure 9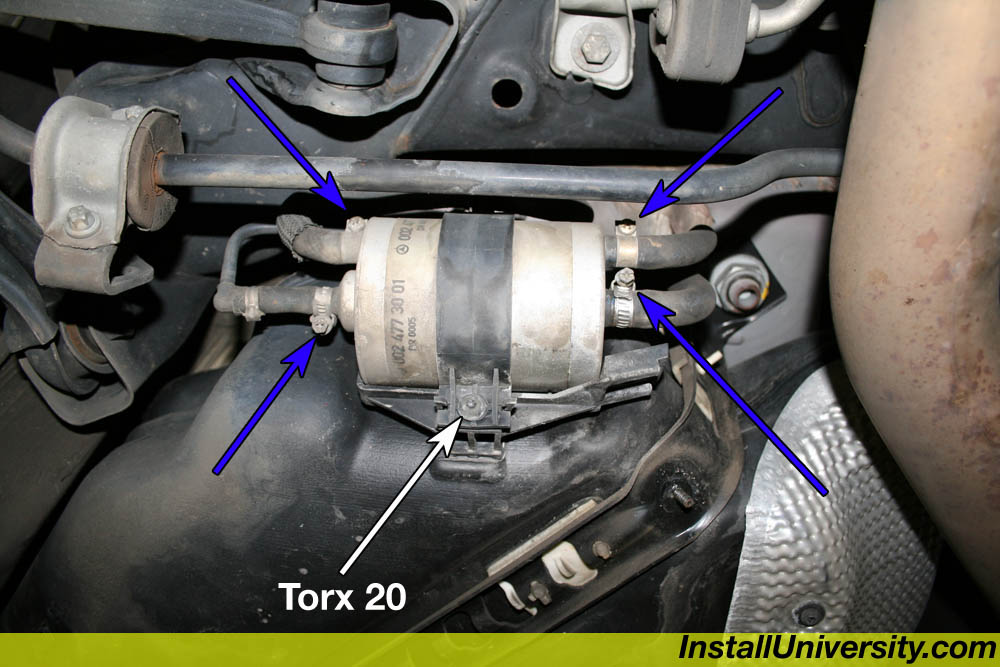
Figure 10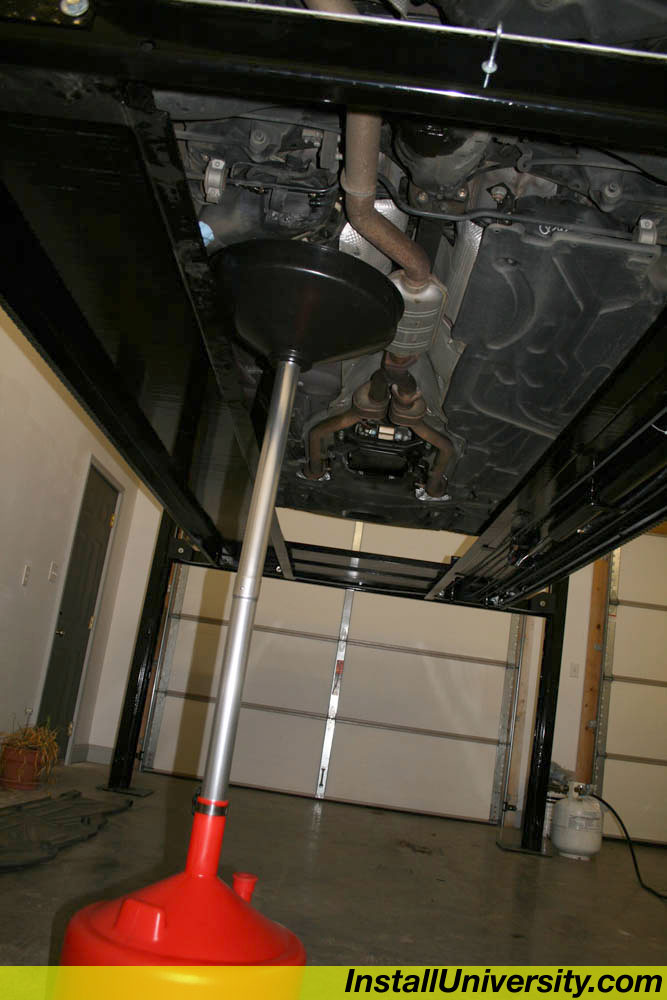
Figure 11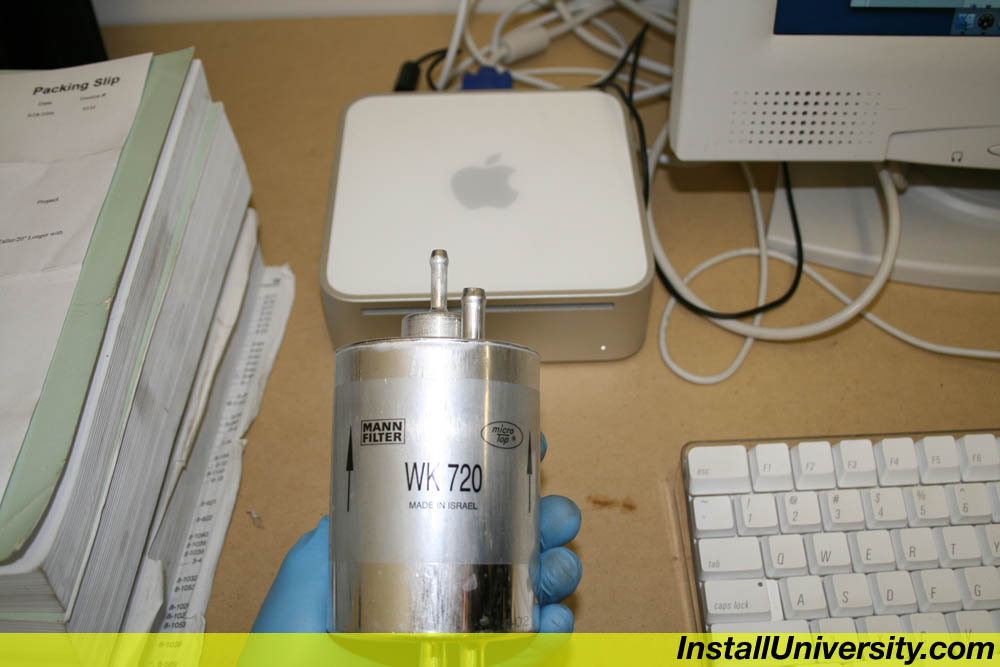
Figure 12