Transmission O-Ring Repair
2002 C240: Transmission O-Ring Repair with Partial Transmission Fluid & Filter Change
When viewing, using, and/or any other method applied to this publication you agree to the following statements. You, your next of kin, heirs or assigns release www.installuniversity.com, all other persons associated in the making, production, and participation of this publication. Rephrased in plain English: When you view this web page you, your next of kin, heirs or assigns agree not to sue any associated persons with the publication for any accident or damage in ANY form (mental or physical to your car and/or yourself) because of this publication, or your failure to heed proper safety, maintenance and/or modification procedures. You also agree that your next of kin, heirs or assigns cannot sue all persons associated in the making, production, participation, and publishing of this publication.
Perform all these installs at your own risk. Know how to use all of your shop equipment, and take necessary safety precautions when performing ANY modifications and or maintenance items to your vehicle. Seek the advice of a paid professional and do not substitute this publication for the advice of a paid professional. This product is how we accomplished our installs and is not meant to be carved in stone. InstallUniversity.com is not responsible for a mistake, misprint, or any other error found in this guide. This guide is intended as a supplement and not to be your only source of information.
Symptom(s): The transmission pan is covered in oil and it seems to be coming from the transmission plug.
Date Repaired: 1.022006 Mileage: 133,500
Quote to fix from local MB dealer: N/A
Part information, cost, were purchased:
1. Mercedes Benz automatic transmission fluid (ATF) -
2. Transmission filter
3. Transmission tube lock pin - $1.60 P/N 140-991-00-55
4. 722.6 Mercedes Benz dipstick - $38.50 ZDMAK
5. Rags
6. Transmission tube funnel
7. Electrical part cleaner
8. Brake fluid cleaner
Time it took to install: 90 minutes
Complexity of Install: Easy - Medium
Tools needed for this install:
1. Ratchet
2. Short 3" socket extension
3. T-30 torx screw
4. Pliers
5. Lift - Jack stands and jack
6. Safety glasses
7. Well ventilated area
8. Protective latex like gloves
9. Catch pan
10. Small hex wrench (#3 or 4)
Install Contributors
1. Sunil Patel (sunman)
2. mleskovar
Introduction
This is an easy service to perform. It is very messy too. Just be careful and take your time. After all, this is your transmission and not a rear spoiler so be sure you are careful. This modification may be a bit tricky on Rhino Ramps because of the low clearance.
Installation Procedure
1. Read this entire document before starting the install. I made some big goofs and you do not need to make the same mistakes I did. It may cost you a transmission so proceed with caution.
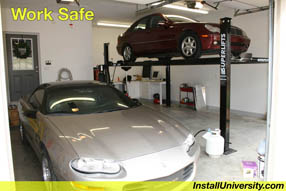
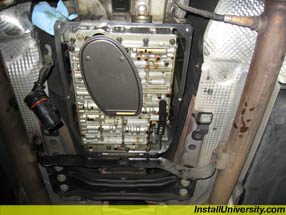
2. Raise your vehicle on a lift, ramps, jack stands, or suitable safe position in a safe manner. You have a choice whether you want to get under the car and make it a SAFE one. Take no chances with your life (Figure 1).
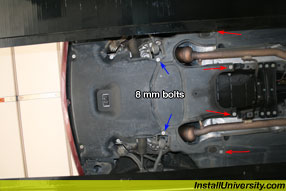
3. Locate the six 8 mm screws on the front rear under cover (Figure 2). Remove them and slide the rear cover out and place it out of the way.
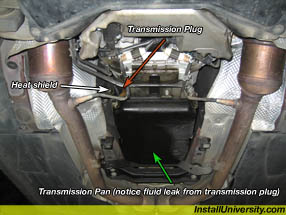
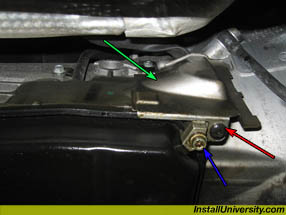
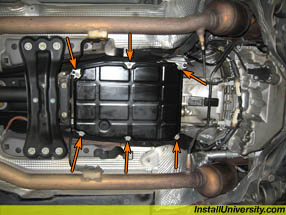
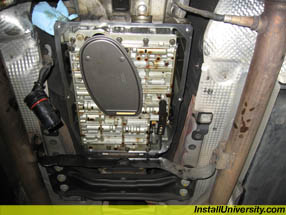
4. Locate your transmission fluid pan (Figure 3). Remove the heat shield using a Torx-30 wrench (red arrow in Figure 4). Lay the heat shield and screw to the side. Clean the shield to know if you have any future leaks down the road.
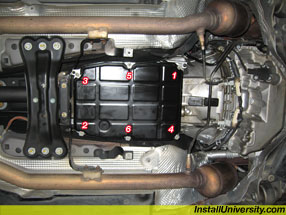
5. Place a catch pan under the rear of the transmission pan. Dropping the transmission pan may be messy and that is the way it is. Be prepared! You ideally want to catch all that falls out so you know how much fluid to put back in as a starting point. The larger diameter catch pan the better. Find th six 8 mm transmission bolts (Figure 5). Remove the two most rear transmission pan bolts. Next, halfway loosen the middle two transmission pan bolts halfway. Then loosen the front two transmission pan bolts half way. Once the fluid running out of the rear of the pan starts to slow, go ahead and remove the two middle transmission pan bolts and finally removing the front two bolts. Empty the remaining fluid in the pan.
6. Steps 6 through 9 deal with replacing the two o-rings that degrade over time allowing transmission fluid to seep through causing a messy undercarriage (Figure 3).
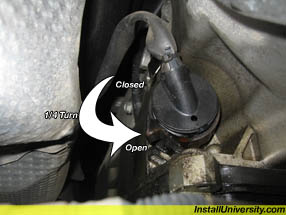
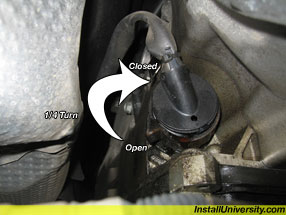
Rotate the white plastic ring with flange a quarter turn toward the passenger side and down toward the ground (Figure 6). Gently pull the transmission plug out of the socket and be sure not to get any fluid on the plug if possible. If it appears fluid did get inside the plug contacts, spray electrical cleaner liberally on the plug and let it dry while you continue the installation.
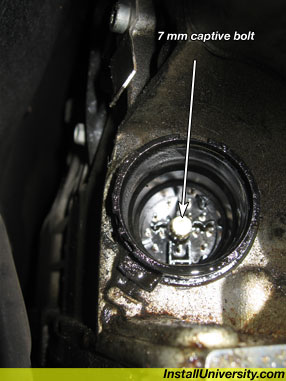
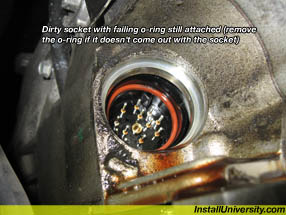
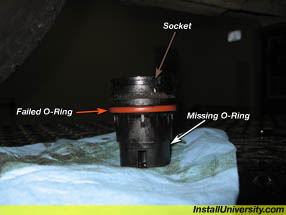
7. Loosen the 7 mm captive bolt inside the transmission plug socket. Once loose, gently pull the socket out. There should be two gaskets on the socket. Notice in Figure 8 that one gasket was left behind and the other gasket made it out in Figure 9. If the gasket(s) stay behind, pull them out.
8. I sprayed electrical cleaner behind the socket (Figure 8) and be sure you get all the grime out and let it dry.
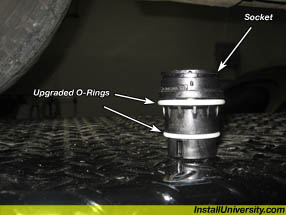
9. Clean the socket inside and out and install the two replacement o-rings (Figure10).
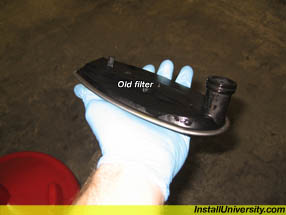
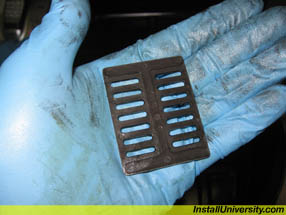
10. While you have the transmission pan off changing the filter is a no brainer. Just pull the filter down out of the transmission. Grab the filter toward the front of the car when you pull down (Figure 11). Figure 12 shows the old filter after removing it.
11. Be sure all contacts and parts are dry before proceeding. Reinstall the socket making sure it is properly seated (there are keyways on the socket). Tighten the captive 7 mm bolt to X in-lb.
12. Plug the transmission plug back into the socket and be sure it is properly seated. Turn the white lock collar a quarter turn toward the passenger side and up toward the top of the car. This will tighten the transmission plug into the socket (Figure 13).
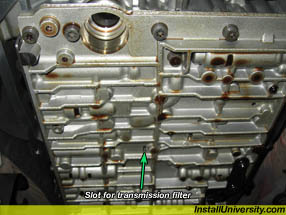
11. Figure 14 shows the bottom side of the transmission without the filter. Notice the tab that sticks out of the top of the transmission filter (Figure 12) and the slot the tab goes in on the underside of the transmission (Figure 14). When you install a new filter, be sure to place the tab in that slot.
12. Locate the magnet inside the transmission pan and clean it (Figure 15).
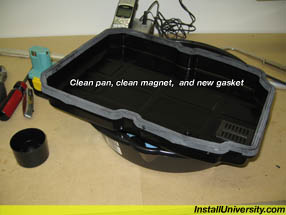
13. Clean the inside and outside of the transmission pan. Place the new gasket on the transmission pan and be sure it is seated properly. Place the clean magnet back in the front of the pan and lay the pan aside (Figure 16).
14. Install the new transmission filter in the car by pushing the neck of the filter up in the filter neck receiver and aligning the tab on top of the filter into the slot on the underside of the transmission (Figure 17).
15. Clean the transmission pan bolts with brake cleaner or other cleaner. Install the new cleaned transmission pan and make sure the new gasket seats properly on the bottom side of the transmission. Hand tight all the bolts then tighten to final 8 N-m in a criss-cross star pattern (Figure 18). Install the metal heat shield and tighten to 8 N-m (Figure 4 green and red arrow).
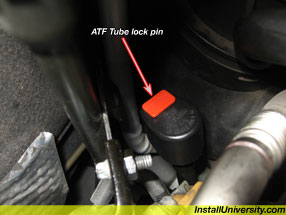
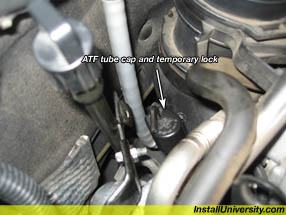
16. Remove the lock tab on the ATF tube lid (Figure 19). You will need to break off the top and press the bottom of the tab down through the tab with a small hex wrench or tool. When you hear it fall out, you can remove the ATF fluid lid.
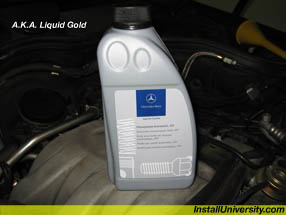
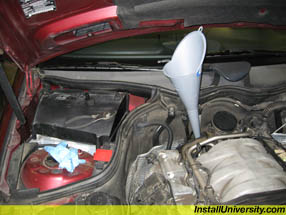
17. It is now time to fill the transmission with new automatic transmission fluid (Figure 20). Using a skinny funnel or ATF fluid funnel (Figure 21) fully insert the funnel in the ATF tube. Slowly pour the ATF into the funnel. When I say slowly pour, I mean as slow as you can without having it run back down the bottle. The tube is very skinny so you can not pour a lot of fluid down the hatch without having it spill out of the bottom of the funnel. It will make a total mess and not be fun to clean off everything (including the floor). So pour very, very slowly and press down on the funnel to ensure a tighter seal to help protect against ATF running out of the bottom.
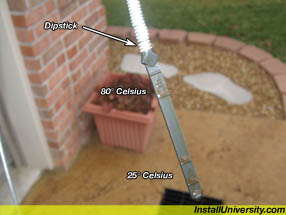
If you measured how much you drained out of the pan, I would pour that amount back in the transmission and take a 15 minute test drive (easy driving and for at least 8 miles or 15 minutes). Take a measurement with your dipstick (Figure 22) while the car is running and see if you need to add or remove any fluid. Hopefully, the fluid is up to operating temperature (80 Celsius), if not, then drive a few more miles to ensure it is.
If you didn't measure the amount of ATF removed, decide on how much you want to start out with. Below is what I did because I had no idea:
I poured in 2.5 liters of fluid, took a short, slow, easy drive through all the gears and then took a measurement (measure the ATF level with the car running). I added fluid slowly because a little goes a long way in raising the total level. I moved in 200 cc blocks. I would add 200 cc of fluid take a measurement. If the fluid level was low, I would add 200 cc more and then take another measurement. If it were still low I would go for a 3 mile easy drive and come back and repeat. Every 400 cc of fluid added got a short 3 mile drive to make sure I was getting a good fluid reading. I ended up adding approximately 3.5 liters of ATF to get it perfectly centered in the 80 Celsius operating range.
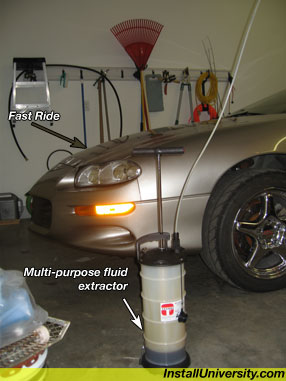
If you overfill, don't worry, you just have to purchase a fluid remover (Figure 23) or re-drain from the pan. I have a fluid remover I use it when I remove engine oil, ATF, gear oil, etc.
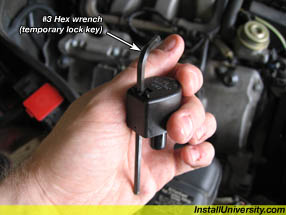
18. If you don't feel like purchasing a ATF cap lock pin to install while you are driving and testing fluid levels but want to make sure the cap doesn't fly off. Don't worry. I used a #3 hex wrench (Figure 24 and 25) to slide down the cap and that locked the ATF cap locked on to the tube. When you are sure you are through with the project, you can install the lock pin and you are back to Mercedes Benz factory condition with no leak!! I am not sure the lock pin serves a purpose other than to let MB know someone has accessed the transmission during the warranty period. The ATF dipstick tube has a good fit without locking it down.
