TH400 Conversion from M6
Transmission Cooler Installation
Transmission Cooler Installation


Tools Needed
Hammer
Punch
Long, strong phillips head screw driver
Flat head screw driver
Adjustable wrenches
Hammer
Punch
Long, strong phillips head screw driver
Flat head screw driver
Adjustable wrenches
Parts List
B&M 70266 Trans Cooler
Bolts, washers, and nuts
Fabrication for Aluminum Brackets
B&M 70266 Trans Cooler
Bolts, washers, and nuts
Fabrication for Aluminum Brackets
Deciding where the transmission color needs to be mounted. A lot of people choose many different locations to mount their transmission cooler. A six speed car from the factory, does not have the luxury of the built-in sucky transmission cooler. This is a great thing!
After much looking, inspecting, I decided to mount my transmission cooler in the front of the car in front of the AC condenser just above the air dam. First lesson, more room is needed for the size transmission cooler used in this project. A B&M xxx
After much looking, inspecting, I decided to mount my transmission cooler in the front of the car in front of the AC condenser just above the air dam. First lesson, more room is needed for the size transmission cooler used in this project. A B&M xxx
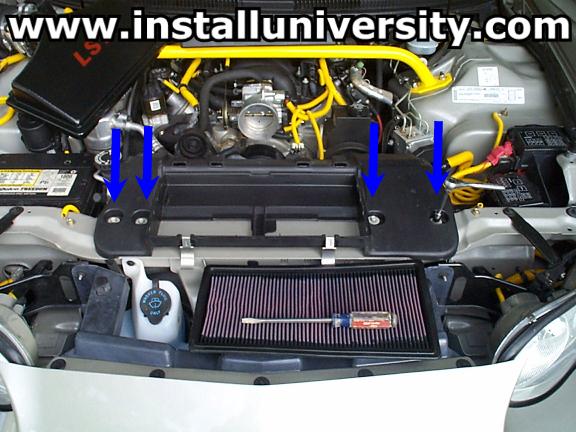
First, remove the air lid and lower air box assembly. I chose to remove everything from the air lid to, but not including, the throttle body.
The four bolts are 10 mm and you will need a screw driver to remove the tube between the air lid and mass-air-flow housing or mass-air-flow and throttle body.
The four bolts are 10 mm and you will need a screw driver to remove the tube between the air lid and mass-air-flow housing or mass-air-flow and throttle body.
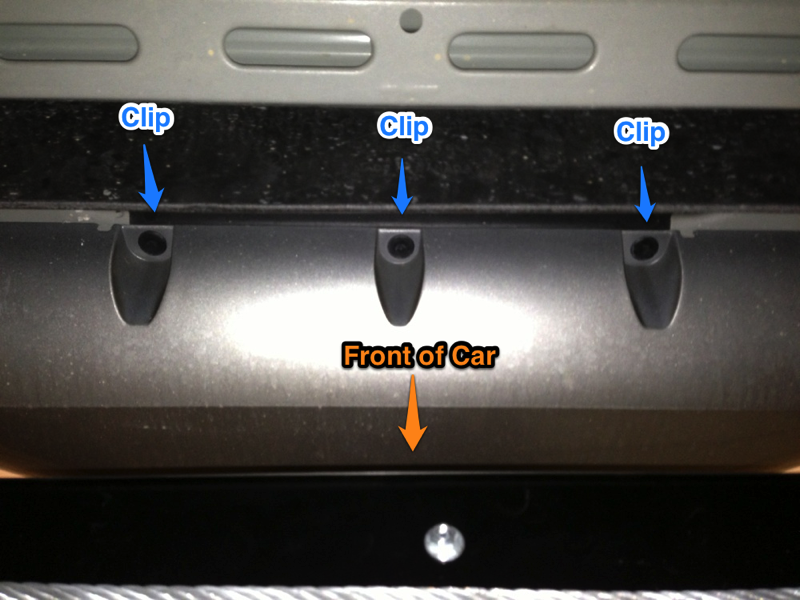
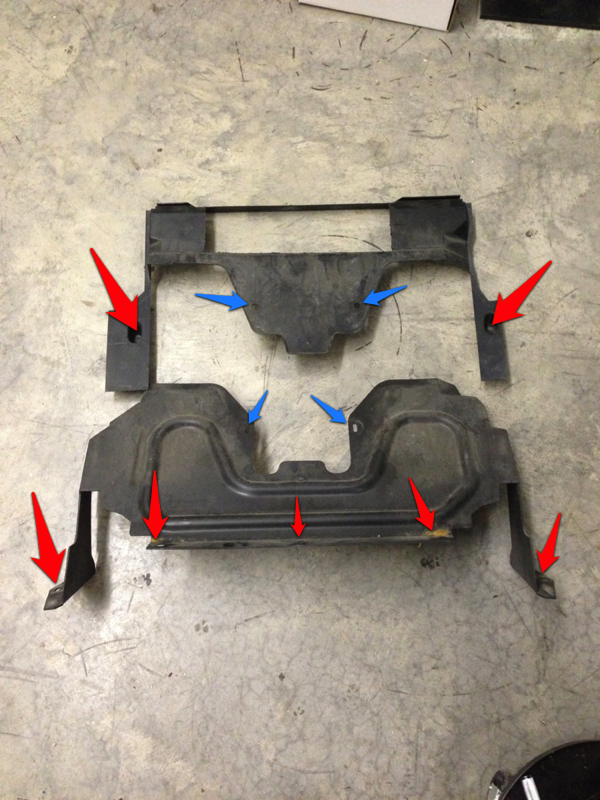
Remove the upper and lower black plastic shrouds. Since I had removed some clips from the shroud waaaaaaay back in the day when performing the Fast Toys Ram Air modification, pointing out every clip may not be accurate but this is easily accomplished.
You will need to remove three plastic push pins (clips) under the front bumper. Once the shrouds are out reinstall the push pins.
You will need to remove three plastic push pins (clips) under the front bumper. Once the shrouds are out reinstall the push pins.
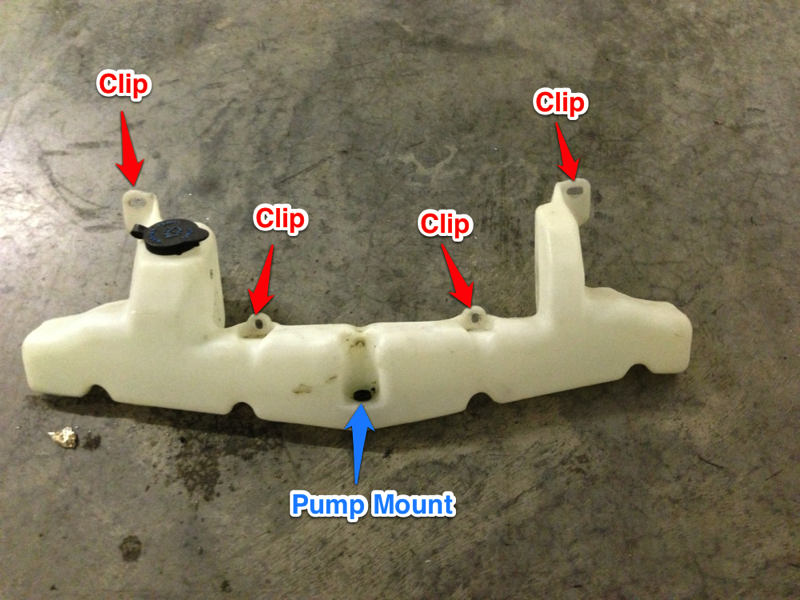
The next item I removed was the windshield washer reservoir. I know, I struggled with this until I was sure there was no other way I was going to be happy with.
I never use my wipers on my camaro. Never, ever. That is why God had someone invent Rain-X and gave me the good sense to never drive my car in the rain. :-) Still, I think of my camaro as a daily driver, which it is not, and that made this choice that much harder. A few minutes later it was out.
Remove the four clips, unplug the electrical connector, and remove the pump. Don't worry, it is all very self explanatory. I didn't even think about the pump when removing this and I removed the pump by coincidence when pulling down on the reservoir.
Having made enough room for my B&M transmission cooler, a bracket system had to be made to fit the transmission cooler and be mounted to the car.
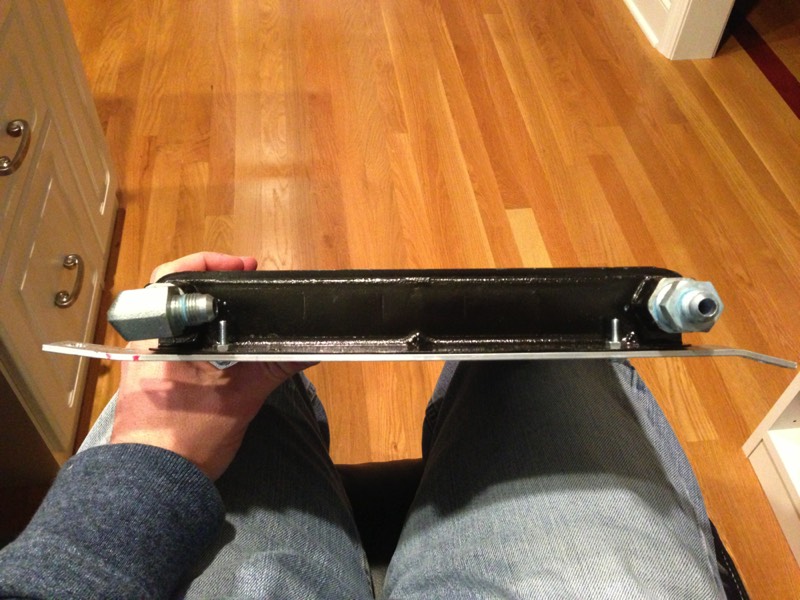
A 1" wide x 0.125" thick x 4' long piece of aluminum was purchased from Home Depot. Measurements were taken, much thinking, and then the cutting, drilling, and bending process started.
You can see the final setup. The good news is the bends are forgiving and easily done with a vise or crack in the driveway. Make sure the brackets don't protrude outside the cooler as space is still at a premium.
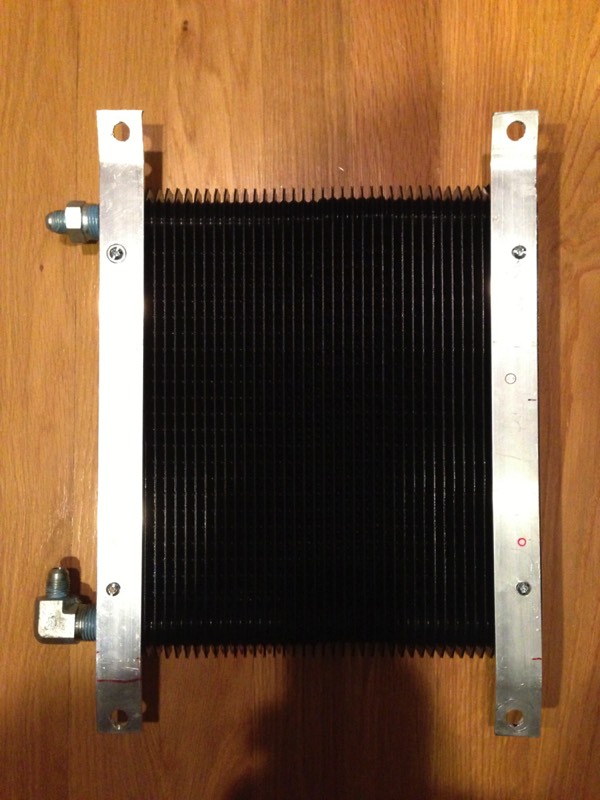
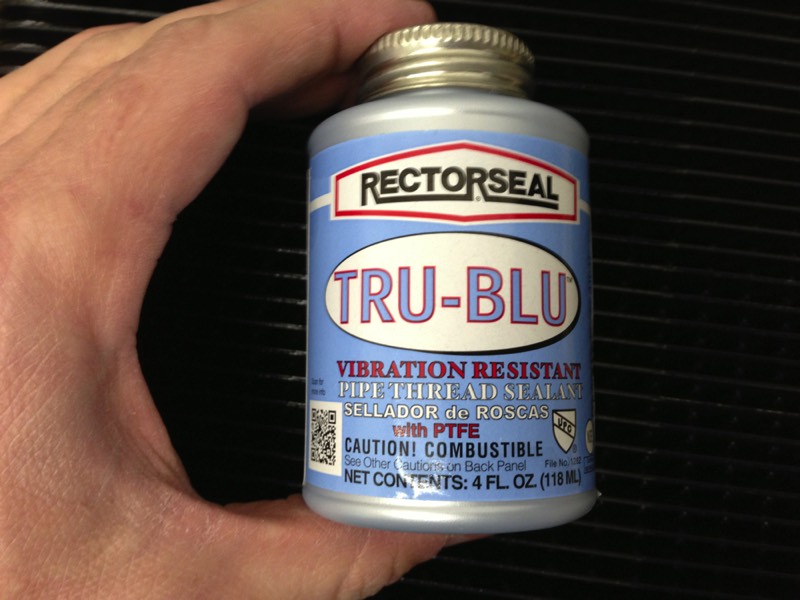
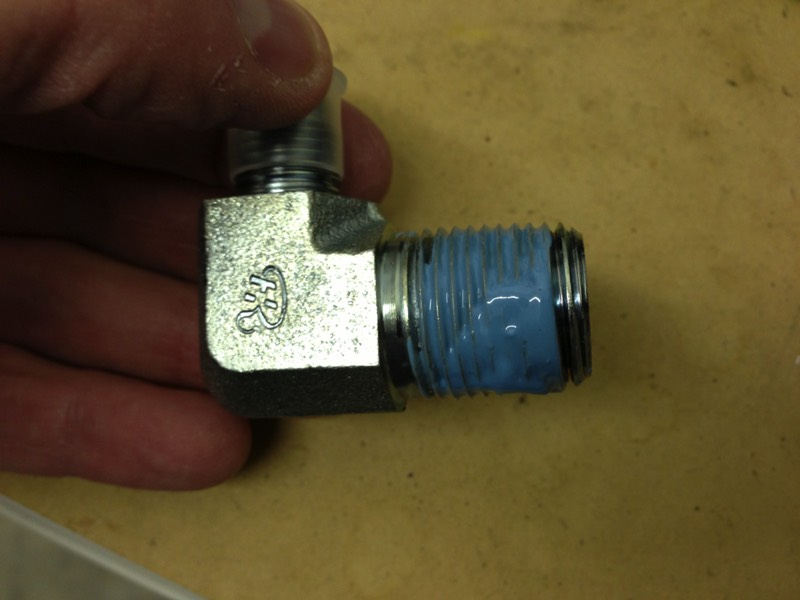
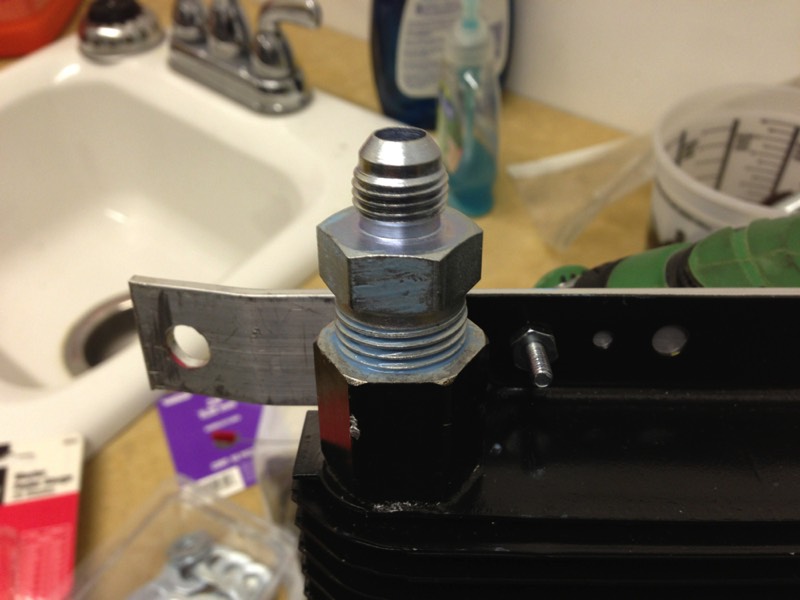
The next step was to tighten up my fittings into the Transmission cooler. I went with AN -6 size lines. I used teflon blue on the NPT threads going into the B&M transmission cooler and tightened. I put the mojo on it with two 12" adjustable wrenches. I used a 90 degree fitting for the top and a straight for the bottom.
Do not use teflon on the AN side of the threads. The bevel side is not made for it and using teflon will actually cause leaks since it works on the friction principle to achieve a seal.
Do NOT use teflon tape on these threads. Use the liquid (brush on teflon). Per Rossler Transmissions the tape causes an added layer around the threads which increases the outside diameter of the NPT threads and can cause the transmission casing to crack when tightening the fittings into the transmission.
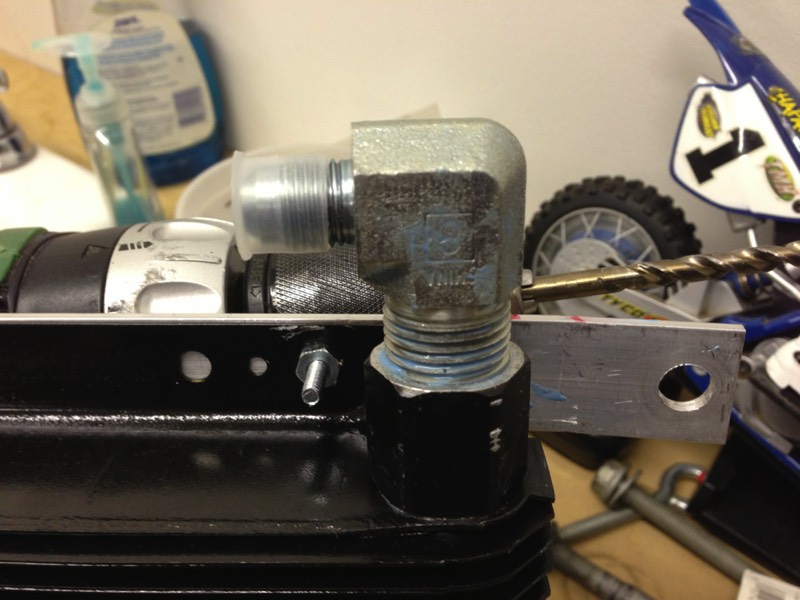
There needs to be a few notes added here regarding AN and JIC fittings. To most, they will look alike when not paying close attention. I would recommend you purchase Made in the USA AN -6 fittings. Regardless of your purchasing choice, you need to check the fitting to be sure they are AN fittings and not JIC.
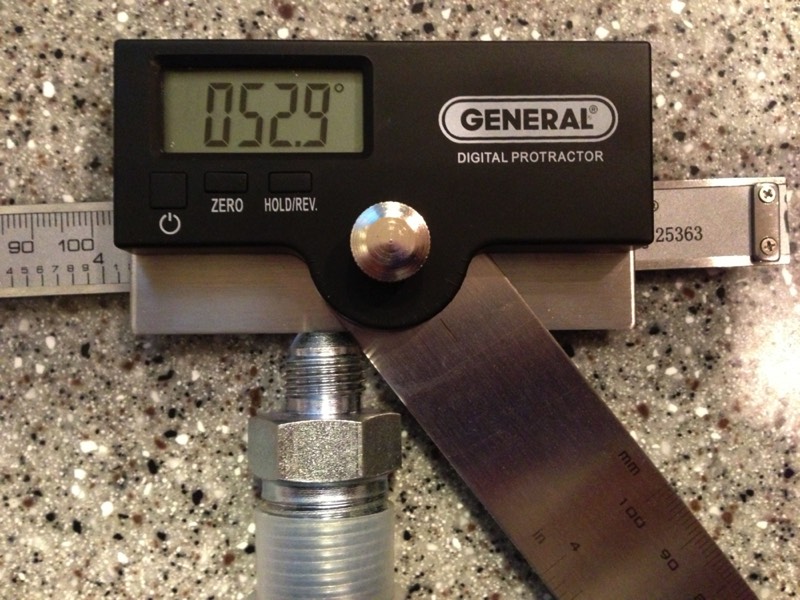
The AN fitting will measure out close to 37 degrees. Don't freak out if you measure 53 degrees. Complementary angles from high school will tell you that you need to subtract 53 degrees from 90 to get the actual measurement. Of course this is dependent on how the fitting is measured but either way, you will get 53 degrees or 37 degrees or something very close. I measured 38.5 degrees which told me I had the correct angle.
I then measured the outside diameter and got 0.474" and that sealed the deal that I had AN fittings. Bottom line, make sure you have AN fittings and JIC. It is a good idea to just order the fittings from your hose provider. I recommend Ormes.com and Pegasus Racing for these needs. I am not paid by either of them and in fact I pay for my parts just like you. They don't even realize this web site exist. They are just the only two companies I would trust with this application. Same goes for Rossler Transmissions. I take no money or receive any discounts from any of these companies.
You may be wondering why this is so important? It is because JIC fittings look the same but are not and will leak right off the bat. A lot of companies selling these two fittings get it wrong and don't know the difference themselves.

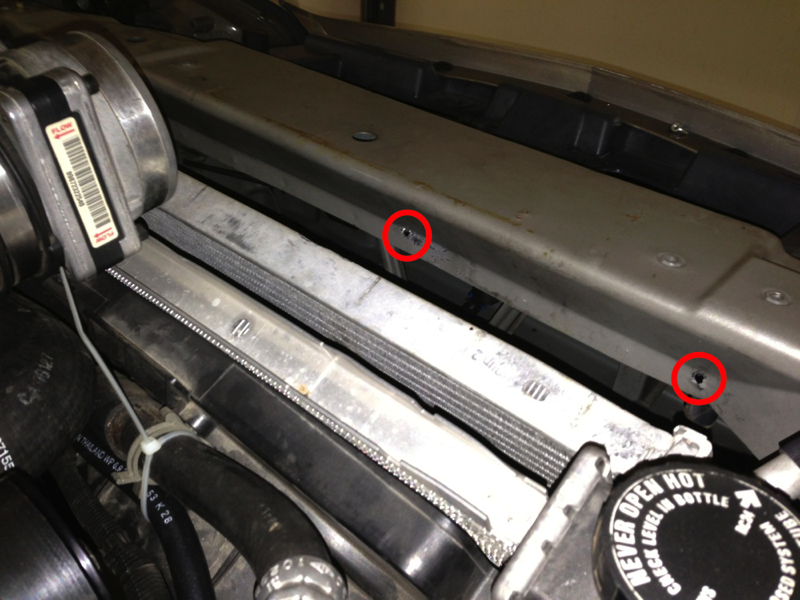
Take a punch, a very long one, and a hammer and get your holes started before drilling out for your bolts. In one instance I just beat all the way through the metal with a long phillips screwdriver. Just be careful not to hit your radiator, AC condenser, or anything else important!
I used a punch to make drilling out the holes easier.
I used a punch to make drilling out the holes easier.