2-Point BMR Shock Tower Brace Installation
| Tools and parts you will need: |
| BMR Shock Tower Brace |
| 15 mm socket (deep well) |
| Ratchet |
| Torque wrench |
| 15 mm wrench |
Car: 1999 Z28 Camaro, 5,200 miles
Installers: Eric and Kelly Barger
Email: help@installuniversity.com
People who helped us from major tech talk to general advice:
Jack (Jack98SS)
Perform all these installs at your own risk. Know how to use all of your shop equipment and take necessary safety precautions when performing ANY modifications and or maintenance items to your vehicle. Seek the advice of a paid professional and do not substitute this publication for the advice of a paid professional. This product is how we accomplished our installs and is not meant to be carved in stone. We are not responsible for a mistake, misprint, or any other error found in this guide. This guide is intended as a supplement and not to be your only source of information.
Purpose: This modification will connect the two shocks and try to evenly distribute the load placed on each shock throughout a turn. It also decreases body roll and makes the car more controllable and responsive in the turns.
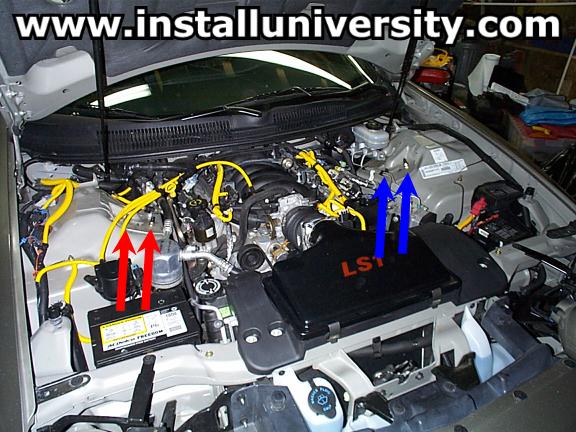
1. Make sure your car is parked on a level surface. Open the hood of your car and look on the driver’s side of the car. Locate the two nuts on top of the shock tower housing (see the blue arrows in Figure 1). Take your 15 mm socket (you will need a deep well socket) or wrench and loosen the two nuts. Then look on the passenger side of the car and loosen the same two nuts (see the red arrows in Figure 1).
Figure 1

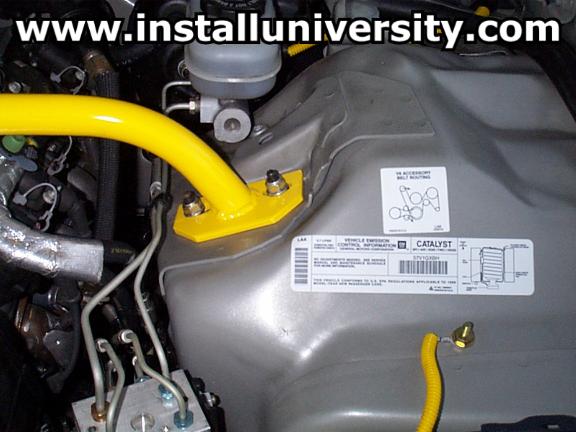
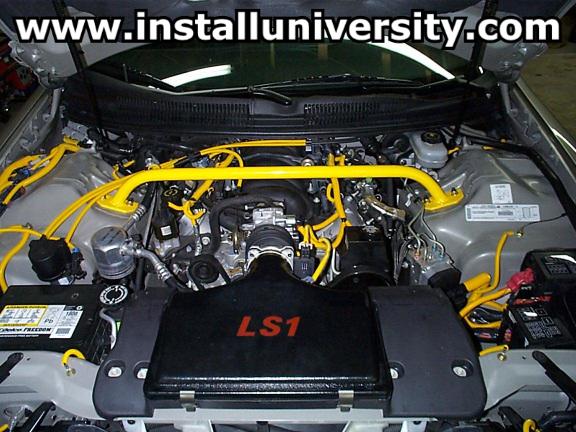
2. Place the Shock Tower Brace on the studs where you just removed the nuts. Now just replace the nuts on the bolts. Don’t tighten them up just yet. First, make sure that you have centered the shock tower brace so the bolts don’t rub up against the base plate on the shock tower brace (see Figure 2). Once you have the shock tower brace centered, you can then tighten up the outside nuts back to the 32 ft-lb torque specification. Then you will probably have to use a wrench (depending on what model shock tower brace you have) to tighten up the nuts on the inside. All four nuts are supposed to be tightened back to 32 ft-lb. You should just use your best judgment on how tight to get the nuts on the inside back on. See Figure 3 for the completed install.
Figure 2

Figure 3

Comments: We had no other structural/suspension modifications to our car when we added the shock tower brace. This modification was worth every dime. The shock tower brace keeps the front stays flatter throughout curves and really reduces some of our body roll. The car feels more controllable and more responsive after this modification.
Web Author: Eric Barger help@installuniversity.com Copyright © 1999 - 2002 Eric Barger. All rights reserved. Revised: June 07, 2007.