15" MacBook Pro A1211 Core 2 Duo Hard Drive Replacement
Remove battery.
Stacks Image 414
Three Phillips screws should be removed from the memory cover using a PH00 Phillips screw driver.
Stacks Image 416
Remove the memory cover.
Stacks Image 418
Remove the two Phillips screw inside the battery compartment closest to the outside of the case.
Stacks Image 420
Remove two T6 Torx screws and four Phillips screws running along the screen hinge.
Stacks Image 2400
Remove four Phillips screws on the side with the DVI and ethernet port.
Stacks Image 2407
Remove two Phillips screws on the backside of the case.
Stacks Image 2414
Remove four Phillips screws on the magnetic power adapter side.
Stacks Image 2421
Lift the keyboard carefully. You will have to pry it up starting from the screen side working your way back to the trackpad. BE CAREFUL: There is a ribbon cable attached to the underside of the keyboard so lift carefully.
Stacks Image 2428
Remove the tape from the trackpad and keyboard connector. Disconnect the trackpad and ribbon cable connector from the logic board.
Stacks Image 2440
Carefully lift the ribbon cable running along the top of the HDD. The ribbon cable will most likely be glued to the top of the HDD. There is no need to disconnect the two white connectors.
Stacks Image 2447
Remove two Phillips screws on the hard drive retaining bracket.
Stacks Image 2454
Lift the hard drive out of the case and detach the hard drive cable.
Stacks Image 2461
The MacBook Pro case is now missing the hard drive. :-)
Stacks Image 2468
Remove the four T6 Torx screws and rubber vibration isolators; two on each side of the hard drive removed from the computer. Transfer these items to the new hard drive. The silver screws are attached on the right hand side and the black screws are for the left hand side of the drive. This may or may not matter but it is best to put them back as they were arranged by Apple.
Stacks Image 2488
Black screw on the right hand side of the hard drive.
Stacks Image 2502
Silver screws on the left side of hard drive.
Stacks Image 2509
Reassemble this device by following these instructions in reverse order.

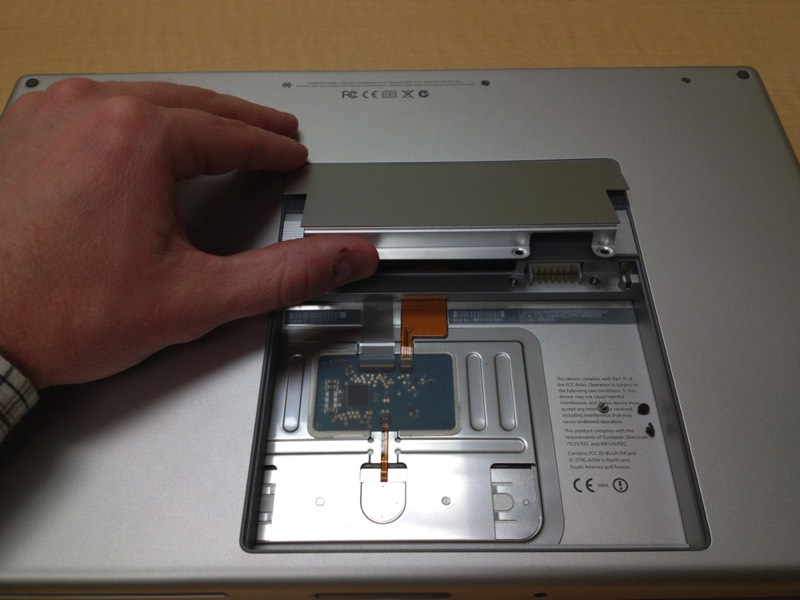
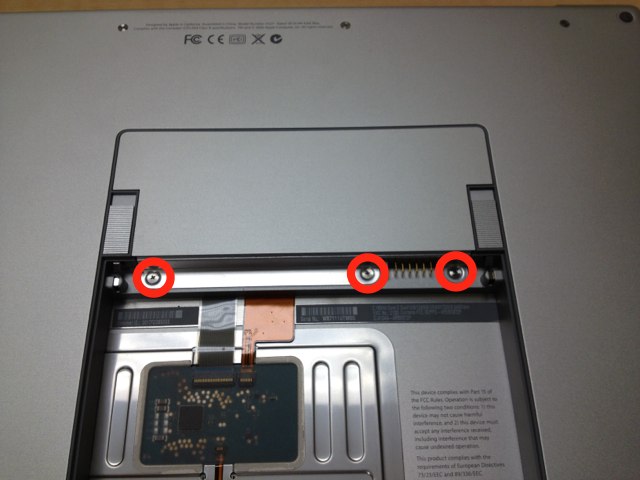
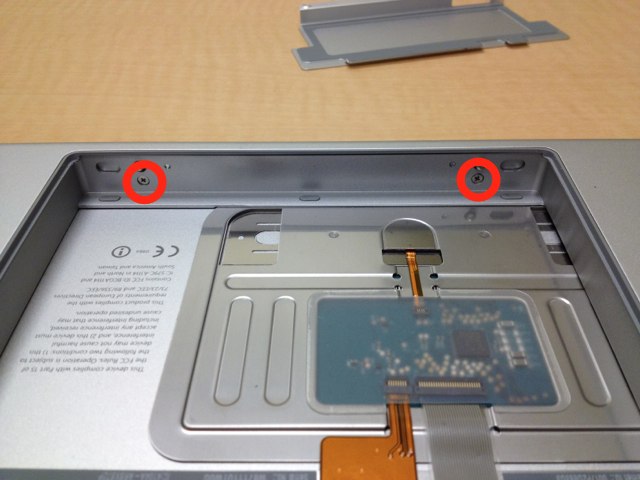
When placing the hard drive back into the case be sure the cables marked in the photo to the right are below the track pad area.