!MAF: Porting the Mass-Air-Flow Housing
Tools
and parts you will need:
Expect approximately 20 minute – 60 minute change time.
|
Date: Car: 1998 LS1 Firehawk Installer: Patman Email: gatts@home.com People who helped us from major tech talk to general advice:
|
When purchasing, viewing, using, and/or any
other method applied to this publication you agree to the following statements.
You, your next of kin, heirs or assigns release www.installuniversity.com,
all other persons associated in the making, production, participation, and sale
of this publication. Rephrased in plain English: When you purchase
this CD, book, or view this web page you, your next of kin, heirs or assigns
agree not to sue any associated persons with the publication for any accident or
damage in ANY form (mental or physical to your car and/or yourself) because of
this publication or your failure to heed proper safety, maintenance and/or
modification procedures. You also agree that your next of kin, heirs
or assigns cannot sue all persons associated in the making, production,
participation, and sale of this publication.
Purpose: This modification will replace the mass- air- flow housing. This will smooth out and increase air flow through the mass air flow housing giving your car some extra horsepower.
Preface: Before you start into this install be sure you know how to use all of your shop equipment. Take your time and be careful.
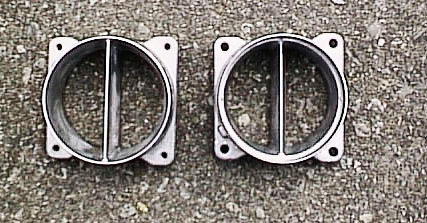
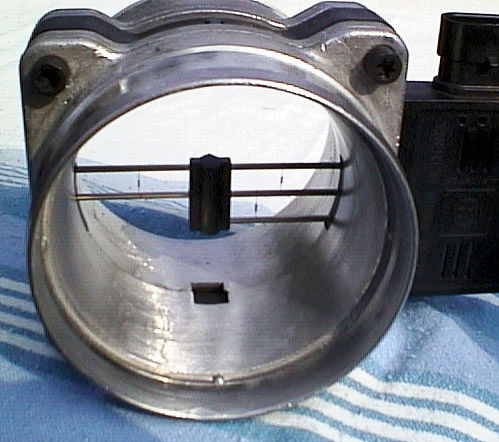
1. Here are the steps involved in porting the MAF. First of all, remove the MAF from the intake, and take the 3 pieces of it apart. Set the center electronics section (black section with the wire sensors) aside, away from the other parts to keep out of harms way. Here are the two halves unmodified. Notice the center dividers, this is what you need to remove, on both halves (see Figure 1 below).Figure 1
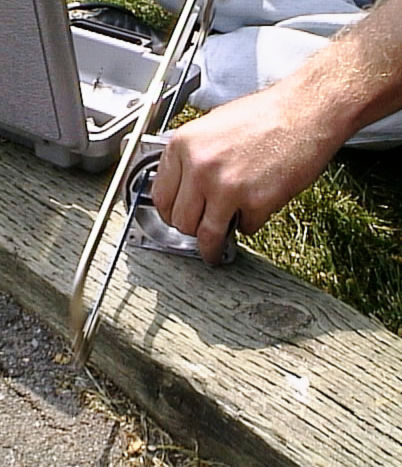
2. Take the hacksaw apart and put it back together so it's inside the MAF piece like this, and start cutting (see Figure 2 below). Go as close as you can, that way you have less to grind down afterwards.
Figure 2
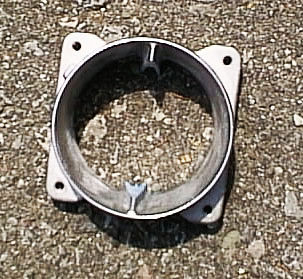
3. Here is what it looks like after it's cut out (see Figure 3 below). We later found we were able to cut much closer than this.
Figure 3
4. Here is Warbird (left) and myself (Patman) doing the grinding and polishing of the MAFs (see Figure 4 below). We found that the best way to tackle this job was to do a few MAFs at once. We ported 4 MAFs, our two, Peter Nikeas and Darren Harris's. Each of us had our own task, Peter was our hacksaw expert, I grinded down what was left, Warbird polished it with the dremel, and Darren gave it a final wetsand and polish with 400grit sandpaper and then put the MAFs back together.
Figure 4
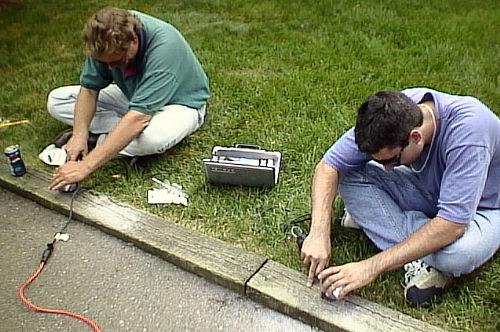
Figure 5
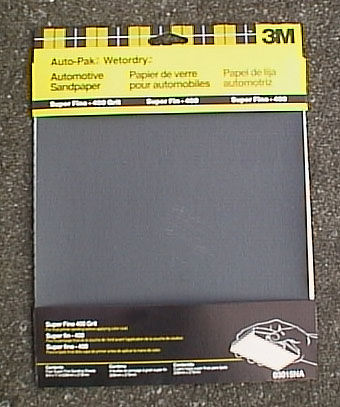
Figure 6
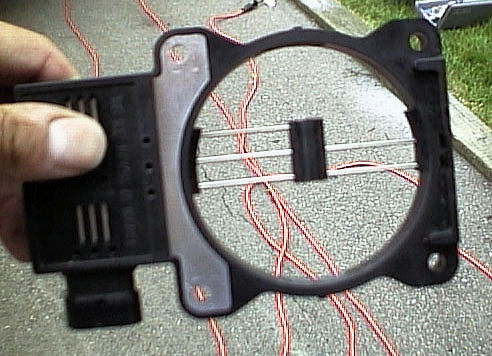
Figure 7
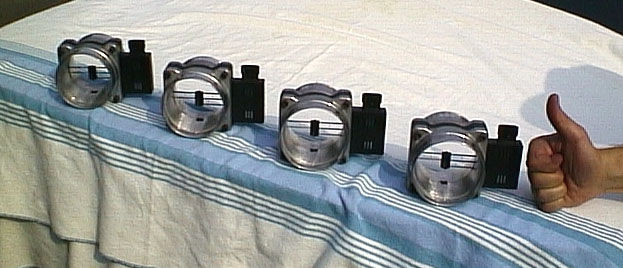
8. Here are all 4 of our finished MAFs in a row (see Figure 8 below), that's Peter's thumb that you see. It took us about 4-5 hours to get all these done, but we could've gotten it done quicker, but the bit I used to grind with was getting very dull so it was taking longer. You'll have to experiment with different dremel bits until you find what works best.
Figure 8
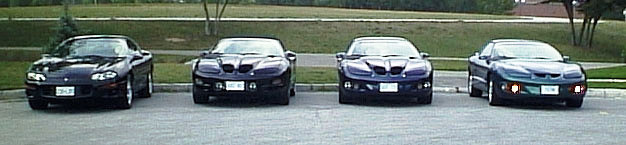
9. Here are the 4 recipients of the ported MAFs (see Figure 9 below)! Peter's black 98Z, Darren's black convertible WS6 TA, Warbird's Navy Blue WS6 Formula, and Patman's Blue Green Formula. After a quick test drive, all of us reported back that the car feels a lot stronger in the top end. This easily makes the most horsepower of the free mods so far!
Figure 9