
Mass Air Flow Housing Swap
Tools you will
need:
Expect approximately 10 – 40 minute install time (depends on how easy your mass air flow housing comes out of your air box lid) |
Date:
Circa
July 1999 Car: 1999 Z28 Camaro, 5,200 miles Installers: Eric and Kelly Barger Email: help@installuniversity.com People who helped us from major tech talk to general advice:
|
When purchasing, viewing, using, and/or any
other method applied to this publication you agree to the following statements.
You, your next of kin, heirs or assigns release www.installuniversity.com,
all other persons associated in the making, production, participation, and sale
of this publication. Rephrased in plain English: When you purchase
this CD, book, or view this web page you, your next of kin, heirs or assigns
agree not to sue any associated persons with the publication for any accident or
damage in ANY form (mental or physical to your car and/or yourself) because of
this publication or your failure to heed proper safety, maintenance and/or
modification procedures. You also agree that your next of kin, heirs
or assigns cannot sue all persons associated in the making, production,
participation, and sale of this publication.
Purpose: This modification will replace the mass-air-flow housing. This will smooth out and increase airflow through the mass air flow housing giving your car some extra horsepower.
Reminder: Make sure you have the keys out of the ignition. Why? When you remove the sensors from the air box lid assembly you do not want to start the car. You will set the Service Engine Soon (SES) light. If you do start the car without placing the sensors back in you can easily reset the SES light by following these steps:
1. Turn key to the "on"
position but don't start car
2. Pull the PCM BAT and PCM IGN fuses in engine compartment
3. Wait approximately 5 minutes
4. Turn ignition off
5. Replace fuses
6. Start the car and then make sure the light has gone off
1. Open the hood of your car and look in the front and center of the engine compartment. Locate the air box lid metal clamps (see blue arrows in Figure 1).
Figure 1
2. Go ahead and undo the air box metal clamps (see blue arrows in Figure 2).
Figure 2

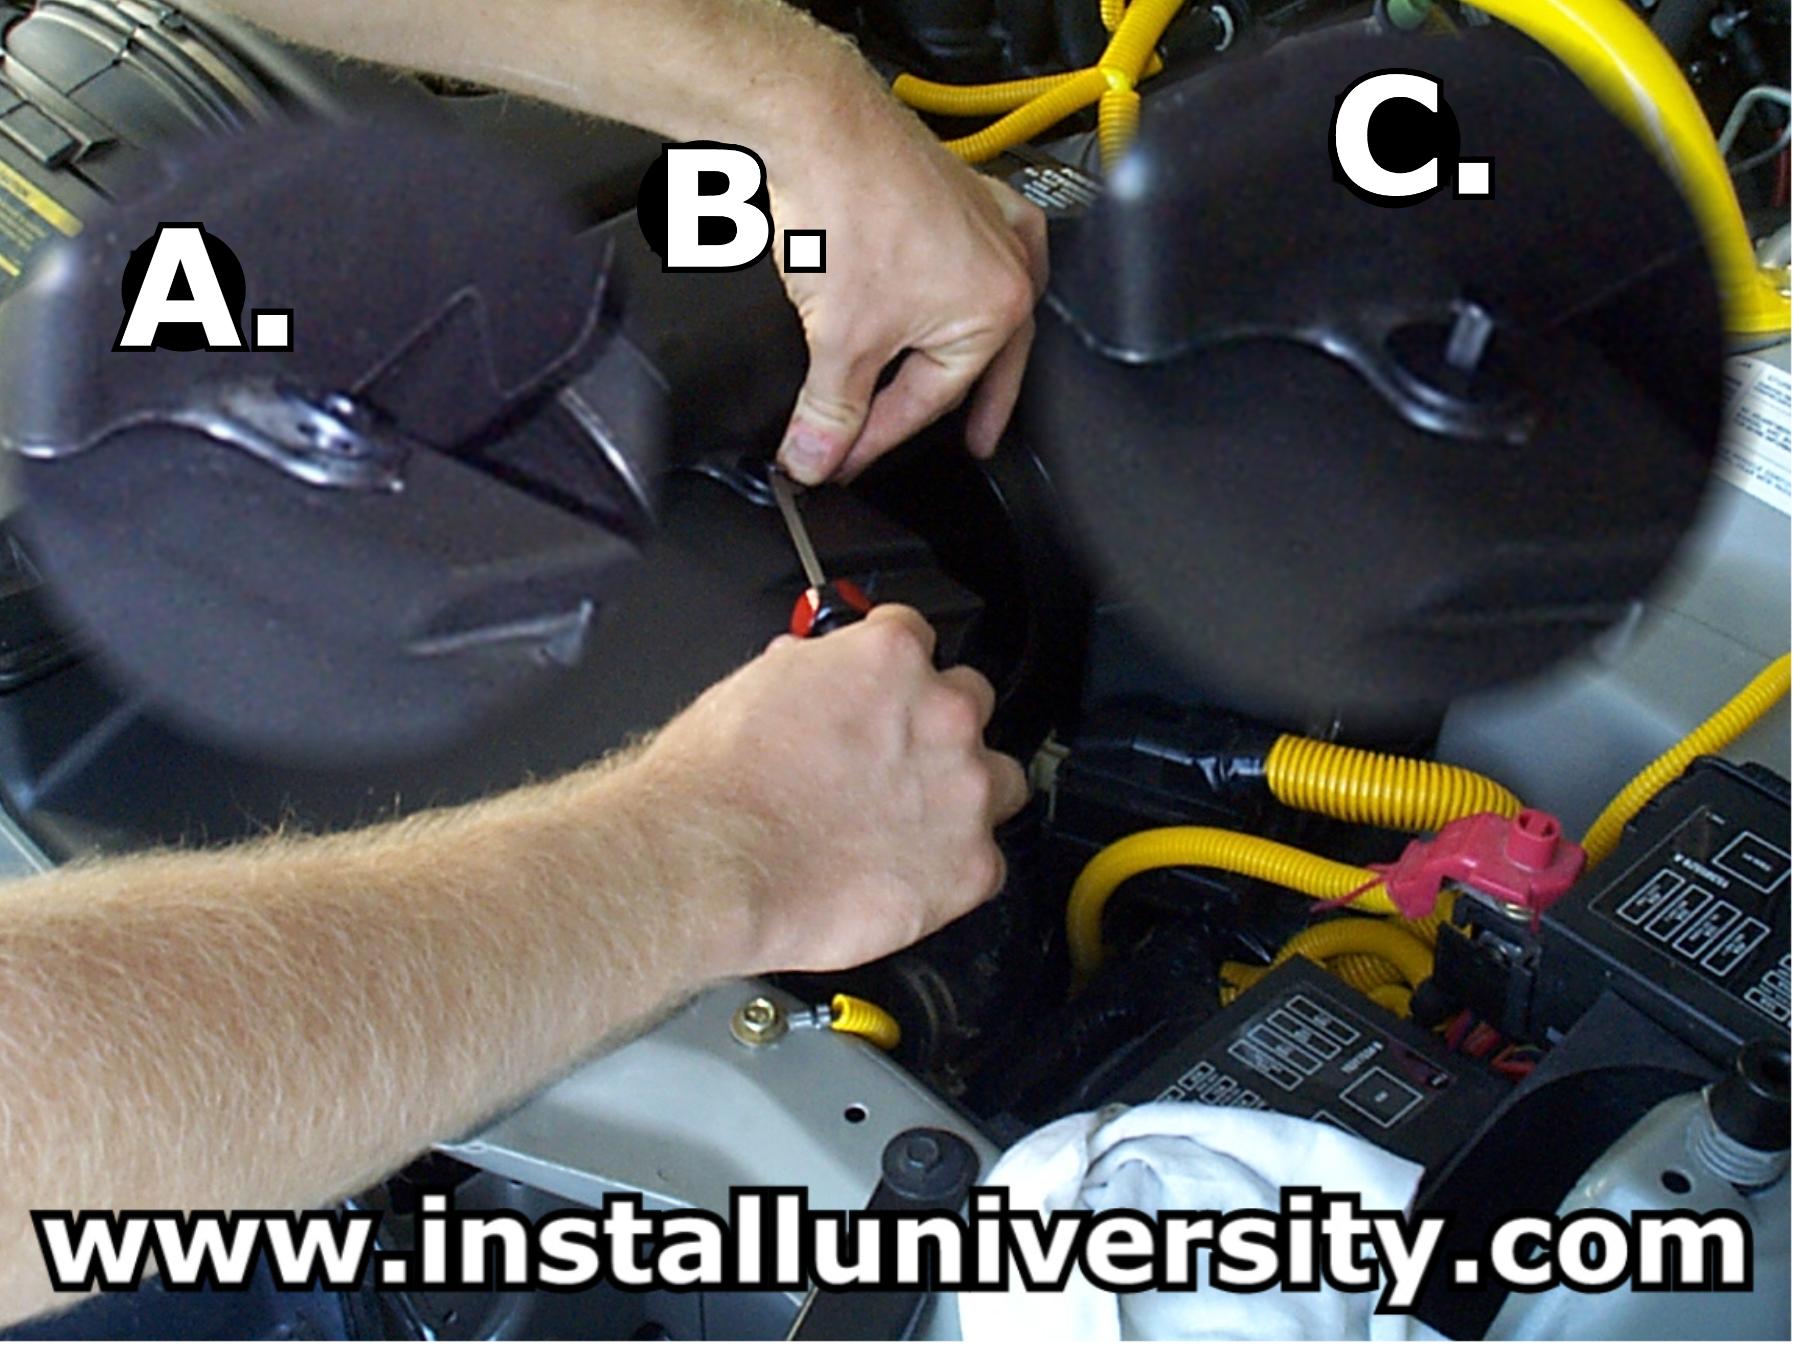
3. Now you will have to remove the two plastic clips that hold down the air silencers (see blue arrows in Figure 3). Refer to Figure 4 for the three-step process to remove a pushpin. A. Locate the pushpin on the driver's side of the air box assembly. B. Place a flat-head screwdriver underneath the head of the pin while holding down the "collar" portion with your thumb. C. Pull pin up and remove.
Make sure to keep the clips just in case you need to replace your factory air box lid for a trip to the dealer or other need. If you do break the clips they come in packs of ten (10) and are really cheap. The GM part number is 12551599.
Figure 3

Figure 4
4. Locate the intake air temperature (IAT) and mass-air-flow (MAF) sensors (see blue arrows in Figure 5).
Figure 5

5. You will need to remove the two sensor connectors from the air box assembly now that we showed in Figure 5 above. You can see an example showing how to remove the sensor connectors safely in Figure 6 below. Gently pull the tab out and lift the sensor out of the housing.
Figure 6

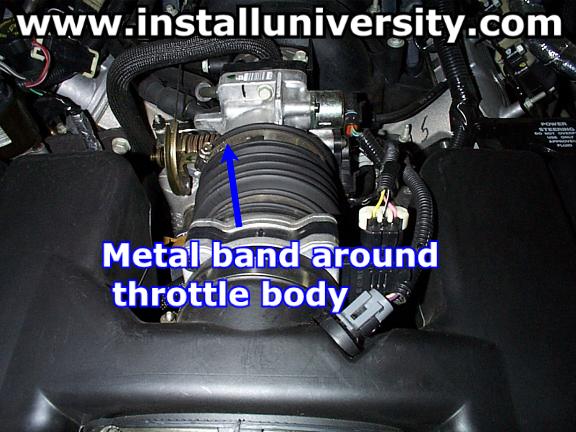
6. Go ahead and locate the rubber flexible hose that runs from the mass air flow housing (MAFH) to the throttle body (TB) (see blue arrow in Figure 7 below). Take a flat-head screwdriver and loosen the metal clamp.
Figure 7
7. Grab hold of the air box, lift and pull towards you (see Figure 8 below).
Figure 8

8. Before you get excited, be very careful with the mass air flow sensor. Don't touch ANY of the little thin wires (see blue arrows in Figure 9). You will screw it up and cost you major bucks ($$$) to get a new one.
Figure 9

9. Take a flat-head screwdriver and loosen the metal band clamp that fits over the air box lid neck that connects to the mass-air-flow housing (see blue arrow in Figure 10).
Figure 10

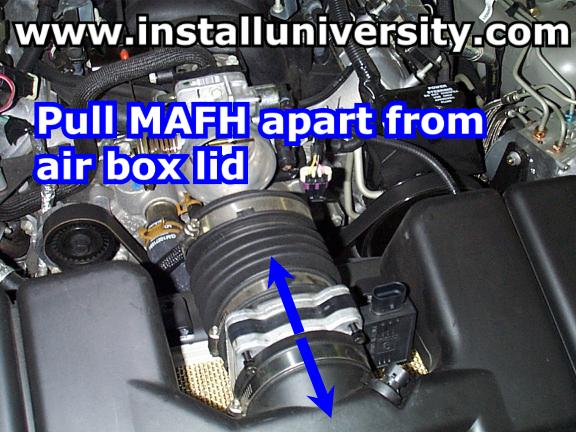
10. You need to pull the MAFH out of the neck on the air box lid (see Figure 11). This might be a very hard step to complete. The MAFH is very stubborn to come out. We heated the neck of the air box lid using a hair dryer and the MAFH finally came out. This is the quickest way to do it if you have a factory air box lid on your car. DO NOT PUSH on the MAF screen from the inside of the air box lid! That will damage the screen and that is the last thing you want to happen.
Figure 11
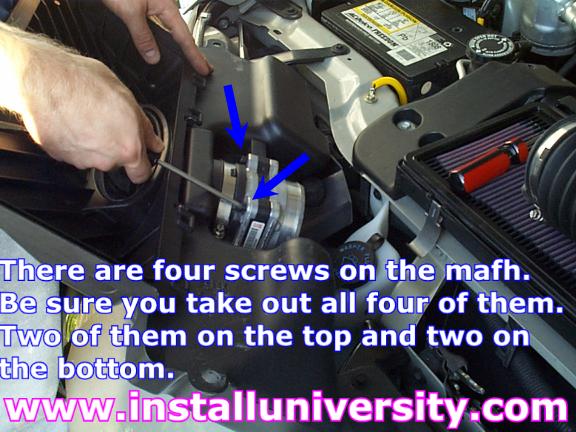
11. Loosen the metal band clamp on the rubber hose that is on the MAFH end. Take your T-25 screwdriver and take out the four (4) torx screws in the MAFH (see blue arrows in Figure 12).
Figure 12
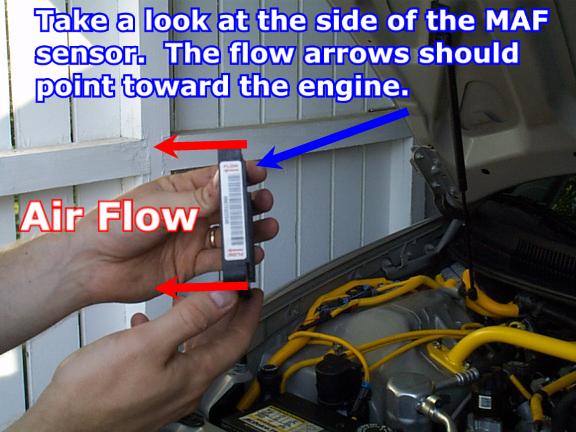
12. Again, be very careful with the MAF sensor. Also, make sure you place the sensor with the "flow" arrows (see Figure 13) facing toward the rear of the car. The sensor will not work properly if the flow arrows are facing the wrong way.
Take your new MAFH and swap them out with the ones you have now. Make sure everything is flush. If the housing does not line up with the sensor you need to make sure the housings are turned the correct way. The housings have notches cut in them so you can line them up correctly.
Figure 13
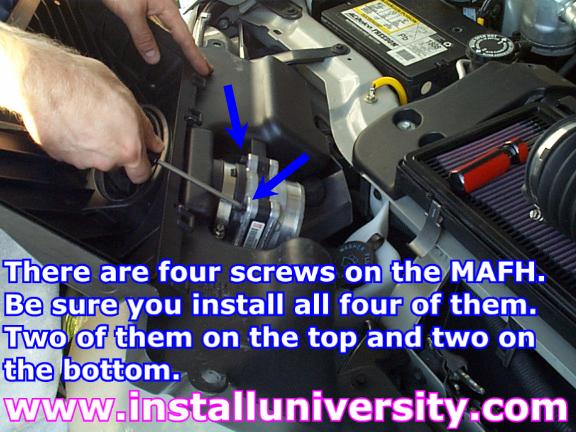
13. Take your T-25 and tighten the four (4) torx screws in the MAFH (see blue arrows in Figure 14).
Figure 14
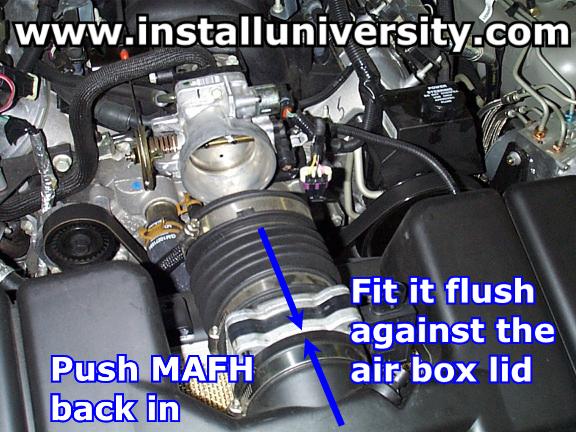
14. You need to push the MAFH into the neck on the air box lid (see Figure 15). DO NOT PUSH on the MAF screen from the inside of the air box lid! That will damage the screen and that is the last thing you want to happen. Make sure you get the MAFH up against the air box lid.
Figure 15
15. Grab hold of the air box lid (refer to Step 7) and push the rubber boot back on the throttle body. Make sure you get the rubber boot all the way back on the throttle body. Then tighten the metal band clamp on the rubber boot (see blue arrow in Figure 16).
Figure 16
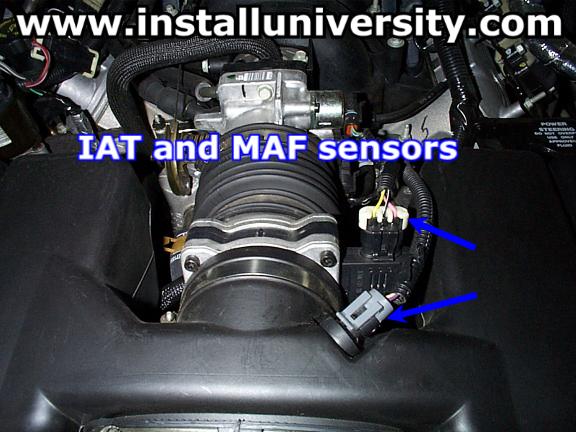
16. Reconnect the wires to the IAT and MAF sensors (see blue arrows in Figure 17). If you do not you will get the Service Engine Soon (SES) light on your dashboard. No big deal but it is nice to avoid the hassle if you can. If you do set the light you can reset your PCM by using the steps mentioned in the Reminder.
Figure 17
17. Reconnect the air box clamps and you are set!
Comments: At the time we completed this mod we had no other performance modifications. We could tell a noticeable difference in throttle response and additional horsepower.
Web Author: Eric Barger help@installuniversity.com
Copyright © 1999 - 2002 Eric Barger. All rights reserved.
Revised:
June 07, 2007
.