1999-2000 PCV Valve Swap
Tools and
parts you will
need:
The Part Numbers for the PCV valve are listed below:
Stock Valve Expect approximately 2 – 15 minute install time |
Date:
June 21, 2000 Car: 1999 Z28 Camaro Installers: Eric and Kelly Barger Email: help@installuniversity.com People who helped us from major tech talk to general advice:
|
When purchasing, viewing, using, and/or any
other method applied to this publication you agree to the following statements.
You, your next of kin, heirs or assigns release www.installuniversity.com,
all other persons associated in the making, production, participation, and sale
of this publication. Rephrased in plain English: When you purchase
this CD, book, or view this web page you, your next of kin, heirs or assigns
agree not to sue any associated persons with the publication for any accident or
damage in ANY form (mental or physical to your car and/or yourself) because of
this publication or your failure to heed proper safety, maintenance and/or
modification procedures. You also agree that your next of kin, heirs
or assigns cannot sue all persons associated in the making, production,
participation, and sale of this publication.
Purpose: This modification will replace the PCV Valve you currently have installed on your car.
Preface: This procedure is for changing the PCV valve for all 1999 and 2000 F-Body cars. The 1998 F-Body's have the PCV valve in a different location.
Before you start into this install be sure you know how to use all of your shop equipment. Take your time and be careful.
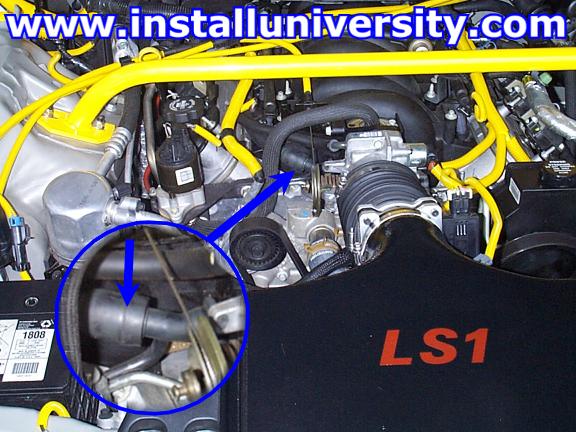
1. Open the hood of your car and look in the front and center of the engine compartment to the left of the throttle body. Locate the PCV valve (see the blue arrows in Figure 1).
Figure 1
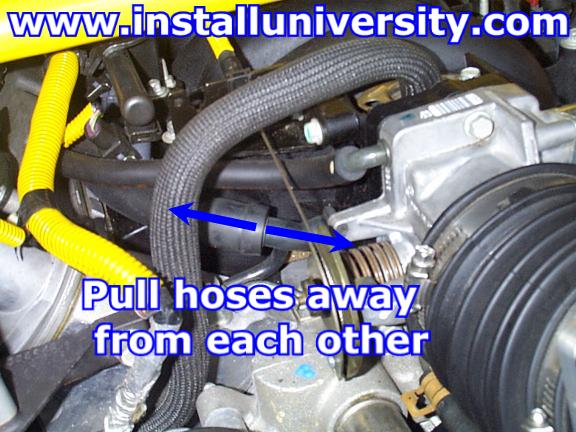
2. You want to pull the larger rubber cover out of the smaller rubber hose (see blue arrows in Figure 2).
Figure 2
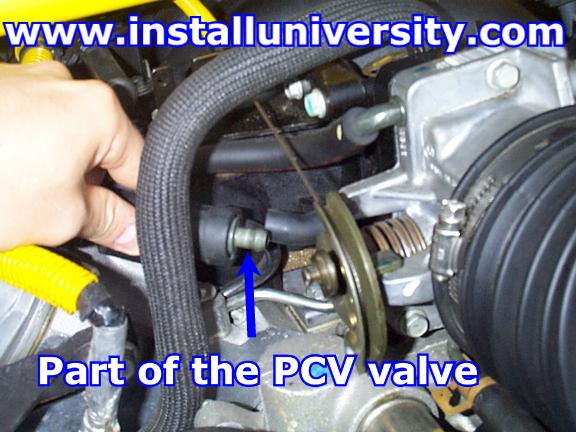
3. You should now see part of the PCV valve sticking out of the hose on the passenger side (see Figure 3).
Figure 3
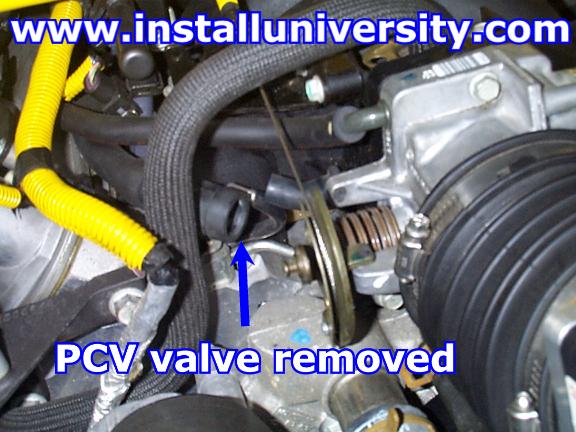
4. You will now need to pull the PCV valve out of the rubber hose. This was a bit difficult using our hands. We got a pair of Robo Grips and pulled the valve out. It came out rather easily using the Robo Grips. Refer to Figure 4 to see the hose after you pull the PCV valve out.
Figure 4
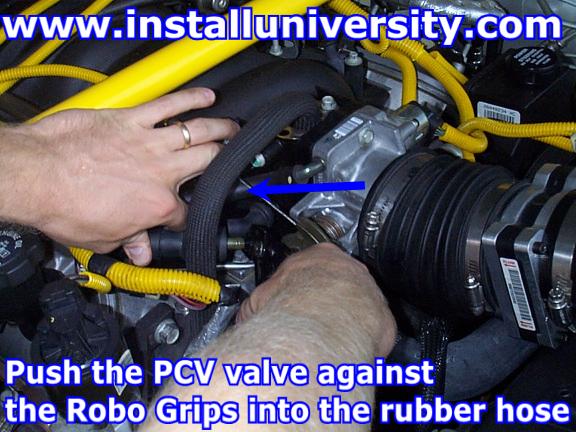
5. You will now need to put the new PCV valve in the rubber hose. We got a pair of Robo Grips and pushed the valve in (see blue arrow in Figure 5). It went in rather easily using the Robo Grips.
Figure 5
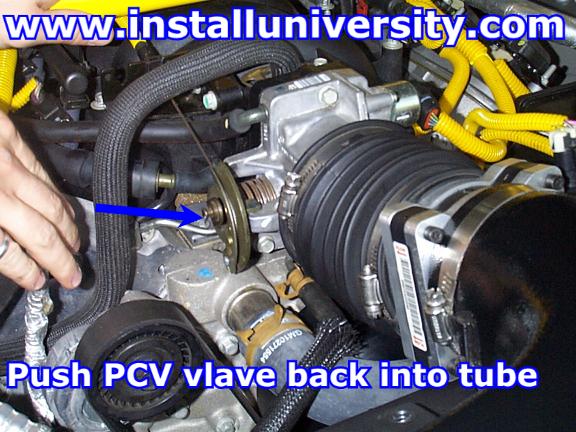
6. Now just push the part of the PCV valve that is sticking out back in the tube that is connected to the throttle body (see blue arrow in Figure 6).
Figure 6
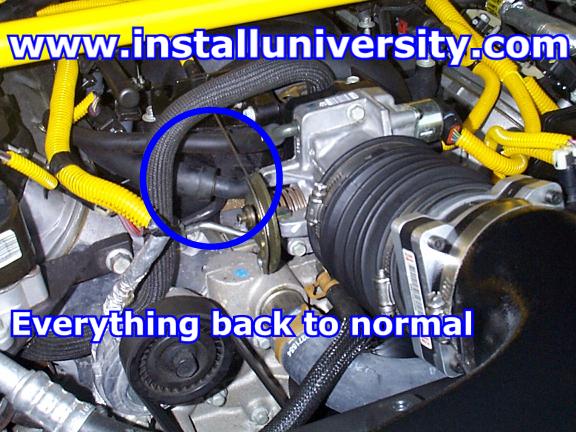
7. You should end up with the install looking like Figure 7.
Figure 7
Comments: Just be sure to keep the valve changed every once in awhile. We changed the valve because we felt we were getting too much oil through the valve that is making its way into the throttle body. We found some oil in the pipe on the throttle body side of the PCV valve and had some oil residue in the throttle body. We have not experienced any major oil usage but we wanted to be safe. If you feel that you are experiencing too much oil getting through, you might want to consider doing the "vertical PCV mod". We should be performing this modification in the near future with a complete list of part numbers.
Web Author: Eric Barger help@installuniversity.com
Copyright © 1999 - 2002 Eric Barger. All rights reserved.
Revised:
June 07, 2007
.