Special thanks to Kris (99WhiteSS) for donating his car for this install and David (99SilverTA) for his help.
When purchasing, viewing, using, and/or any
other method applied to this publication you agree to the following statements.
You, your next of kin, heirs or assigns release www.installuniversity.com,
all other persons associated in the making, production, participation, and sale
of this publication. Rephrased in plain English: When you purchase
this CD, book, or view this web page you, your next of kin, heirs or assigns
agree not to sue any associated persons with the publication for any accident or
damage in ANY form (mental or physical to your car and/or yourself) because of
this publication or your failure to heed proper safety, maintenance and/or
modification procedures. You also agree that your next of kin, heirs
or assigns cannot sue all persons associated in the making, production,
participation, and sale of this publication.
NOTE: All effort has been made to
make this as accurate as possible. Some intermediate steps have have
been accidentally omitted. Please consult a Helms manual or a professional
mechanic if a problem not covered in this install arises.
Tools Required:
7 mm socket
10 mm box-end wrench
11
mm socket
13 mm socket
15 mm socket
18 mm socket
swivel socket
adapter
Flywheel holding tool
Torque Wrench
A lot of Extensions
Brake Cleaner
Dextron III ATF
White Lithium Grease
Clutch
alignment tool
Pictured below is the car that is getting a clutch transplant.
After removing the console (2 7mm bolts, 5 10 mm bolts)
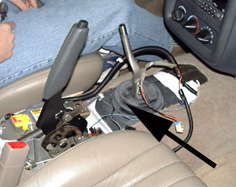
Remove the 7
bolts (7mm) holding the cover over the shifter.
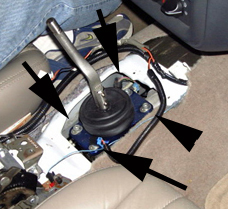
After Removing the boot, remove the four bolts holding the shifter
down. These will
vary depending on your particular brand of
shifter. Make sure the car is in neutral prior
to removing
the shifter Also remember to disengage the E-brake prior to
working under the car.
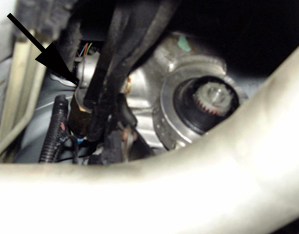
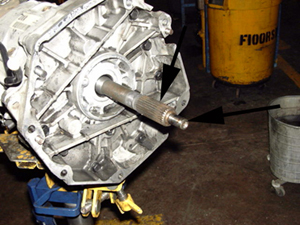
Remove the 4 U-joint bolts with an 11mm socket. Note: 2 of the
bolts are on the other side, just rotate the drive shaft around to access them. Once
the bolts and straps are removed, pry the drive shaft forward by
placing a screwdriver or extension between the drive shaft and the rear yoke.
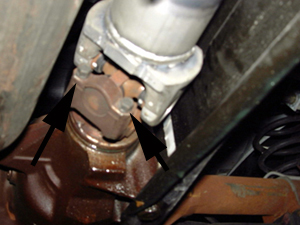
Pull the drive shaft out of the transmission and either remove from the car or put
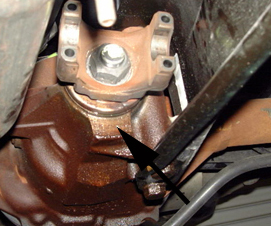
out of the way. Also, this is a good time to check for a leaky pinion
seal. Notice how this car is leaking.
Remove the 2 15mm bolts that secures the y-pipe to the transmission.
They have already
been removed prior to this picture.
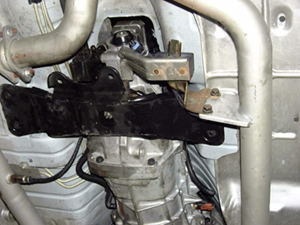
Support the transmission with a jack and remove
cross member by removing the 4 15mm
bolts and the one 18mm bolt. Put the cross member out of the way.
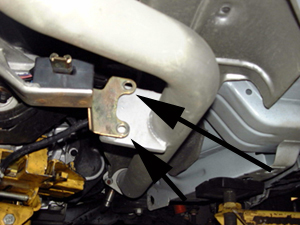
Remove the upper torque arm mount with a 15 mm socket (shallow socket).
Remove the 2 15mm nuts above the bracket and remove the torque arm mount and
bracket.
Remove the 2 13mm bolts holding the transmission
mount and put the transmission mount out
of
the way.
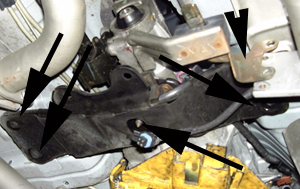
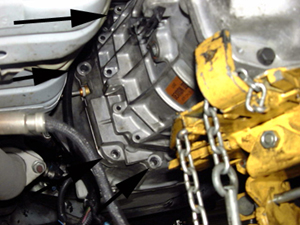
Remove the 8 15mm bolts holding the transmission
to the bell housing. NOTE: The top to bolts are easiest to remove using a long extension
from the rear of the transmission. Once these bolts are removed the transmission
can be slid back several inches. NOTE: Not all bolts are shown in
this picture.
Remove the 2 10mm bolts with a 10 mm box-end wrench.
Then
pull the slave forward
and around the front of the input shaft and let hang
freely. The transmission can now be
lowered and put out of the way.
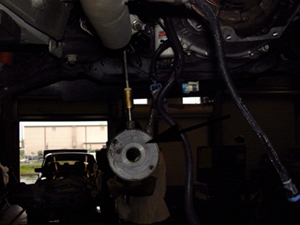
This is a picture of the 288 slave hanging out of the way.
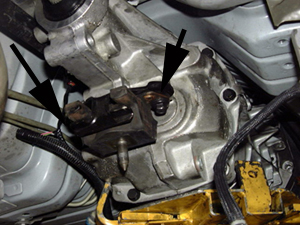
Remove the 8 13mm bolts holding the bell housing
to the engine. The
use of a swivel socket is a necessity to get to some of these bolts.
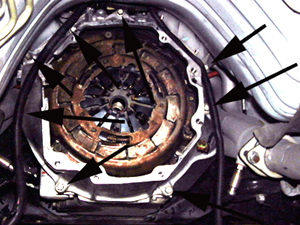
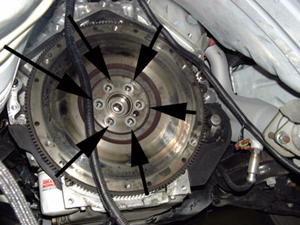
Remove the 6 13mm bolts holding the pressure plate to the flywheel. Be
careful, the clutch disk will fall down once all the bolts are loosened and
removed.
Remove the 6 15mm bolts holding the flywheel to the crankshaft. Remove
the Flywheel
and set aside.
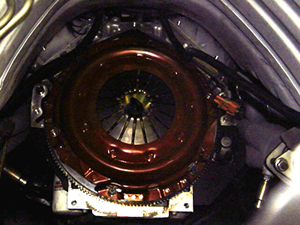
This is what the engine should look like prior to installation of new
clutch.
Install new flywheel and torque the 6 bolts
progressively to 74 ft-lbs in a
criss-cross pattern. Use a flywheel tool (or equivalent to hold the flywheel
during torqing. (sorry no picture) Clean the surfaces the clutch will touch
on the flywheel and pressure plate with brake cleaner. DO NOT touch these
surfaces after cleaning. DO NOT touch the clutch lining! Oil/grease
will reduce clutch life and hinder performance of the clutch!
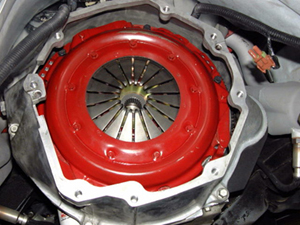
Use a clutch alignment tool to hold the clutch in position and then install
the new pressure plate tightening the bolts to 52 ft-lbs in a criss-cross
pattern.
Reinstall the bell housing using a 13 mm wrench and a swivel socket when necessary. (NOTE: from this point forward, I don't have any of
the torque specs. Consult a Helms manual for these values.)
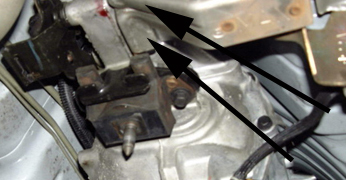
Place some white lithium grease on the input shaft of the
transmission at
the 2
locations marked.
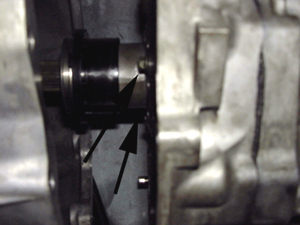
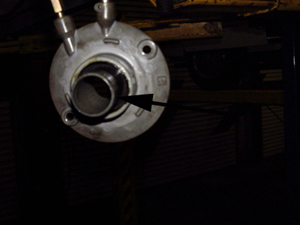
Remove the TO bearing from the slave cylinder by twisting the plastic
retainer until it stops and placing a small screwdriver behind the plastic
and prying up. Place the appropriate shim (consult your McLeod
instructions, we found that red works best for this particular car) over the
shaft, then install the factory shim over the aluminum McLeod shim).
We elected to leave the spring out. Snap the TO bearing back on the slave
cylinder (see arrow).
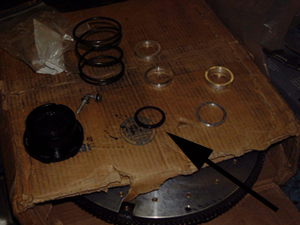
These are the shims, spring and TO bearing. The 4 shiny shims are
the McLeod shims. the black disk is the factory shim. I marked the factory shim with an arrow below since there have been
a lot of questions
as to what it looked like posted on LS1.com
Hoist the transmission back into position then slide the TO bearing back on
the input
shaft. Reinstall the 2 10mm bolts (see removal pic
above) Install the transmission on the bell housing by shaking and height
adjusting until the input shaft has slid into the clutch. DO NOT FORCE
Until the shim choice is confirmed, install the transmission with 2-3 bolts (15mm).
Note: Refer to
relevant pictures above for these steps.
Install the transmission mount finger tight and install the
cross member with 2 13 mm bolts for
shim testing. Also slide the drive shaft into the transmission and install
the u-joint staps on the rear end with a 11mm socket. Install the
shifter. Start the car in neutral. Try putting it in first
gear. If it doesn't go into gear, install a thicker shim. If it goes
into gear, test the engagement point by holding the brake and slowly releasing
the clutch pedal. Ideally you want the clutch to start grabbing
immediately off of the floor since once the clutch breaks in it will move
towards the middle of pedal travel If it engages too high,
install a thinner shim. Change shims (if necessary) by removing the
shifter, cross member, transmission mount, the 2-3 transmission-to-bell housing bolts then
pull back the transmission far enough to remove the slave cylinder. Change
shims as noted above. Reinstall partially as described above And test
again. Once the engagement point is correct, Remove the shifter, drive shaft
and cross member and install the remaining 15mm transmission-bell housing
bolts. Install the torque arm mounting bracket and y-pipe mount
bracket reversing the steps noted above. Pull the torque arm into the
mounting bracket and secure with the single 15 mm bolt. Install the cross member
(4 15mm bolts and 1 18 mm nut). Install the 2 y-pipe support
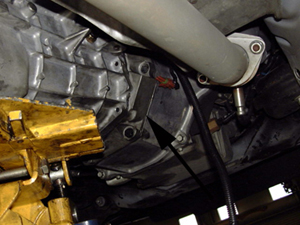
bolts (15 mm, see above). Make sure all of the electrical connections
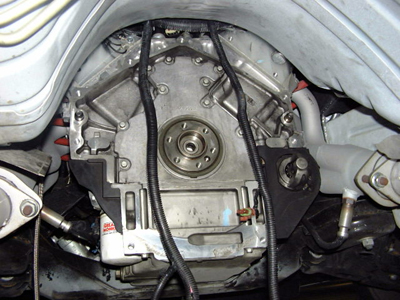
have been re-established. This is what everything should look like now.

Reinstall the drive shaft and double check all the connections and
bolts. Lower the car.
Any transmission fluid lost during install should be
replaced through the shifter housing at this point in time. Place a
little white-lithium grease on the shifter ball (the part that engages with the transmission) and reinstall the shifter, cover and console.
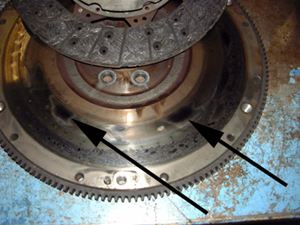
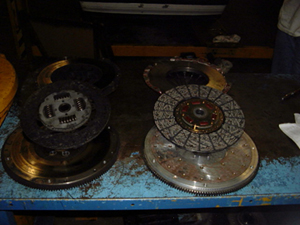
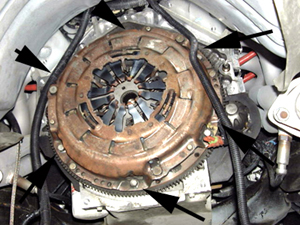
Here are some pictures showing the old clutch (notice the hotspots) on the
old flywheel
(marked by arrows). The second picture shows the old
clutch and new clutch side-by-side.